ButterCMS’s Page content type provides a easy and flexible way to manage and display complex data. If you are currently using or have used our Blog Engine in the past, you know that it’s a rigid template that doesn’t leave room for customization. Pages, on the other hand, can provide that flexibility where you can break up text and images with CTAs, image galleries, forms, and other interactive content to engage with your end users. This guide will walk you through the steps needed to achieve this migration while maintaining your content and ensuring smooth functionality.
Step 1 — Creating Collections
Within the Blog Engine, you are able add multiple Tags and Categories to a blog post.
If you have ever taken a look at our API documentation, you can see that the data properties for Tags and Categories are very simple. They consist of a name key with the value of the category/tag name and a slug key with the value of the category/tag name in Kebab case (kebab-case).
Additionally, our Blog Engine includes author information that you setup with in your account settings. For optimized search engine indexing, we’re going to include a blog author to our blog post and create an author.
Tip: Including a blog author may seem unnecessary but it highlights an author’s credibility and has positive impact in your search engine ranking.
What are collections?
As a refresher — A Collection is a table of data that can be referenced throughout your website, most commonly on pages via the Reference field.
To boil down, or melt away any confusion, a Collection is not a database and shouldn’t replace a database. However, a Collection can be used in:
- Global content (refer here to learn more)
- Common use cases — Header navigation, footer navigation, Testimonial content, blog teasers, etc.
- Tagging and taxonomy (refer here to learn more)
- Common use cases — Brand color, font weight, font family, content categories/tags
- Custom form building (refer here to learn more)
- For instance, creating newsletter signup or contact forms and being able to reuse the same email field with the same parameters (i.e. error messaging, validation logic, etc.)
- Personalization (refer here to learn more)
- Common use cases — Cohort-based personalization paired with your CRM or CDP tool of choice.
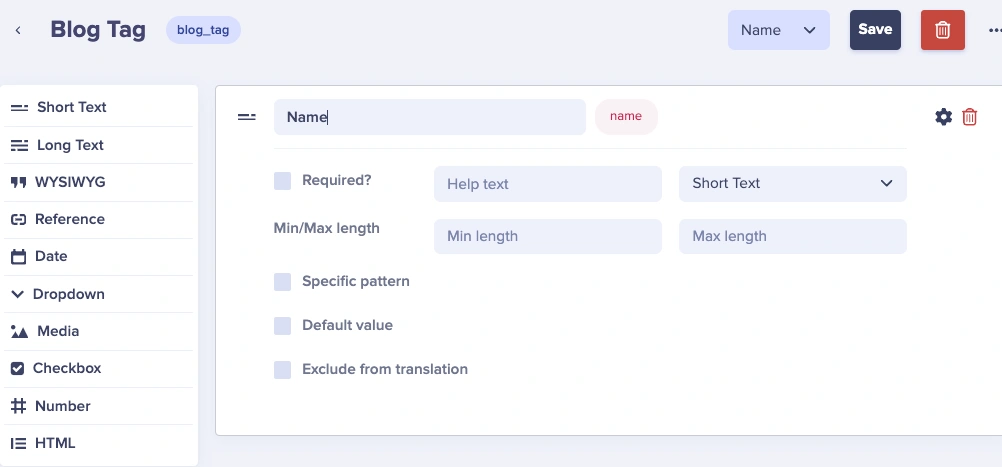
Our Blog Category and Tag Schemas
When constructing our new Category and Tag collections, we just need one, simple Short Text field. To match the Blog Engine, we can call that field name, reflected in the screenshot below:

In the screenshot above, we created a collection named Blog Category, but you can name yours how you want. Next, we’ll do the same step and create a collection for our Tags.
Our Blog Author Schema
As we create our Blog Author collection, we will be following along with the example blog post schema provided by Schema.org. (Scroll down to the end of the page to Example 1 and click on the JSON-LD tab.)
Dissecting the author property within the example blog post schema, we’re going to build our ButterCMS Blog Author collection schema around it.
JSON-LD author schema example:
...
  "author": {
      "@type": "Person",
      "@id": "https://dataliberate.com/author/richard-wallis/#Person",
      "name": "Richard Wallis",
      "url": "https://dataliberate.com/author/richard-wallis/",
      "image": {
          "@type": "ImageObject",
          "@id": "https://secure.gravatar.com/avatar/bbdd78abba6116d6f5bfa2c992de6592?s=96&d=mm&r=g",
          "url": "https://secure.gravatar.com/avatar/bbdd78abba6116d6f5bfa2c992de6592?s=96&d=mm&r=g",
          "height": "96",
          "width": "96"
      }
  },
...
(NOTE: If your company or organization doesn’t list authors for your blog posts and instead you use your company or organization name, we can do the following as well.)
...
	"author": {
	    "@type": "Organization",
	    "@id": "https://dataliberate.com",
	    "name": "Data Liberate",
	    "logo": {
	        "@type": "ImageObject",
	        "@id": "https://dataliberate.com/wp-content/uploads/2011/12/Data_Liberate_Logo-200.png",
	        "url": "https://dataliberate.com/wp-content/uploads/2011/12/Data_Liberate_Logo-200.png",
	        "width": "600",
	        "height": "60"
	    }
	},
...
Due to the flexibility of ButterCMS schema building, we can both use cases into account. Below is our constructed Blog Author collection schema:
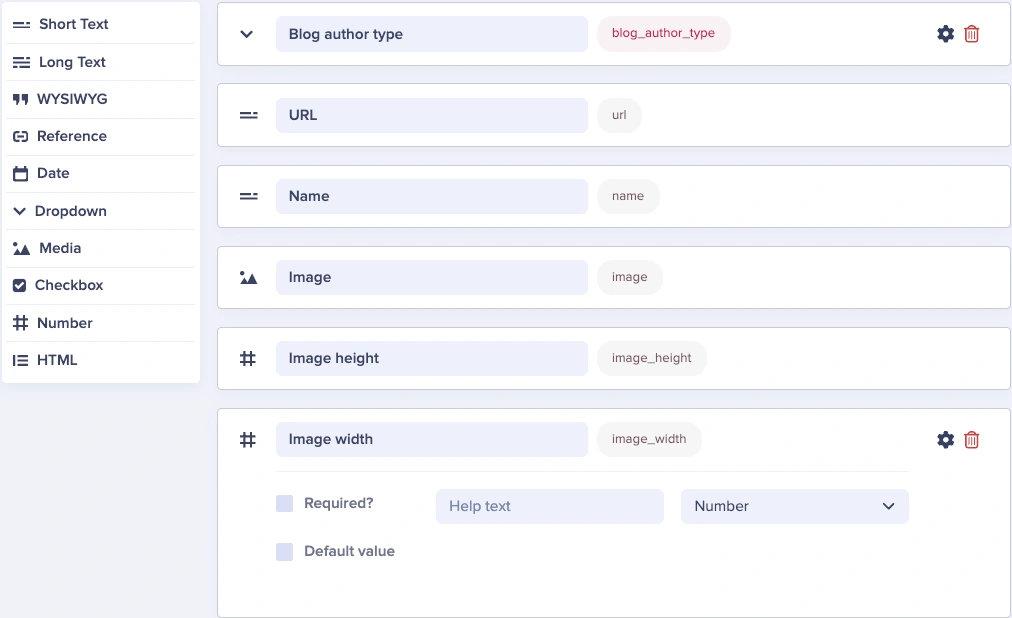
Within our schema we’re using:
- A Dropdown field with the choices of
PersonandOrganization.- When creating your author records you can choose whether the author is a person or an organization/team (i.e. ButterCMS, ButterCMS Product Team, etc.).
- A Short Text field for the URL of the author’s page on the site. Traditionally, this is a page that features all of the blog posts/articles that have been written by that author. (If this author is an organization, you can simply add the URL of the homepage.)
- A Short Text field for the author or organization’s name.
- An Media field for a picture of the author or the organization’s logo.
- Two Number fields for height and width for the previous **Media** field.
- This is also good to include in case you plan on using this information and rendering it on the frontend, similar to other company blogs that feature an author bio and information (please see the screenshot below).

- (Optional) A WYSIWYG or Long Text field for an author bio. You don’t have to include an author bio within your blog post. But since we’re here and constructing this schema, you can add one if you would like.
Migrating your categories, tags, and authors to your new collections
Manual entry can be time-consuming and cumbersome. It can also lead to human error affecting the quality of work.
With a little help from a developer, you can use the Read and Write APIs to programmatically migrate your Blog Engine categories and tags and populate your newly created collections.
If you don’t have a Write API key, please reach out to the ButterCMS customer support team.
Here is how it can be achieved with your categories:
- Use the Read API to fetch a list of all your categories. Refer to the API documentation for code snippets.
- Now that you have this list of categories, you can use the Write API to create new collection records in the new Blog Category collection created. Refer to the API documentation for code snippets.
And that’s it. You have successfully migrated your Blog Engine categories to your new category collection. Next, follow the same steps for your tags.
When it comes to migrating your authors, you would follow the same steps. Using the Read API, you can retrieve a list of all the blog authors within your instance of Butter, then loop over that list and using the Write API, match up the properties from your blog authors to the new Blog Author collection. Migrations with the Write API are very fast and will remove the headaches of manual entry and risk of human error.
Step 2 — Creating Components
What is a component?
If you’re not familiar with the concept of components and it’s use with pages. All that you really need to know is that components are the building blocks of pages where we can add content and functionality to a page. Components offer a reusable schema that we can add to pages and add content to.
Parts of a blog post
Let’s dissect the parts of a blog post. SEO is must-have, so we know that we need to create an SEO component. Blog posts tends to have text and images, so we can create a text component and an image component. We should also add a CTA component which can engage our end users more.
SEO component
This SEO component can be quite simple.
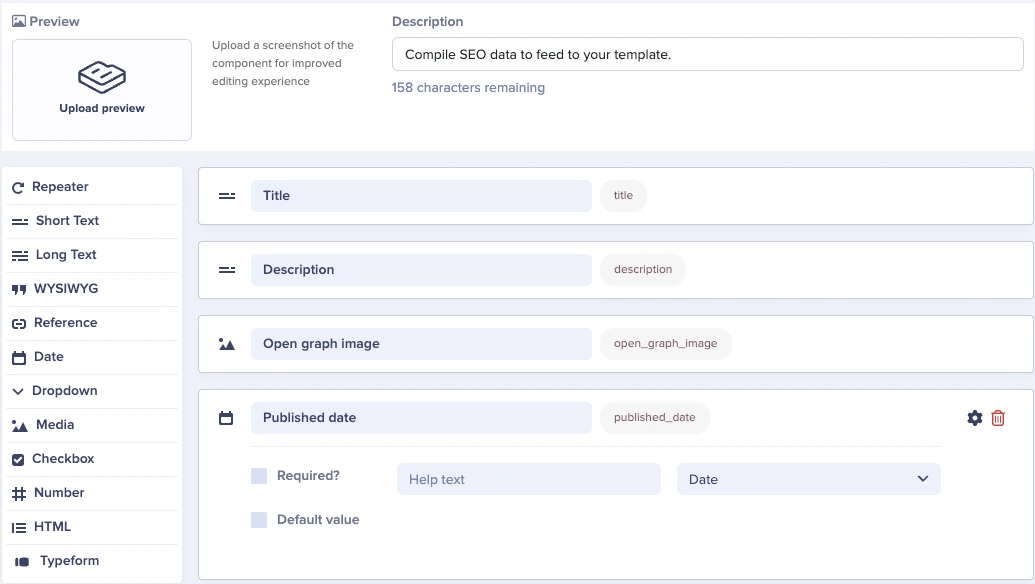
Our fields will be:
- A Short Text field for our meta title.
- A Short Text field for our meta description.
- You can set a max of 150-160 characters for SEO best practices by clicking on the Gear (⚙️) icon.
- A Media field for our open graph image when sharing the blog post via social media and messaging platforms.
- A Date field to set our original published date for SEO and JSON-LD.
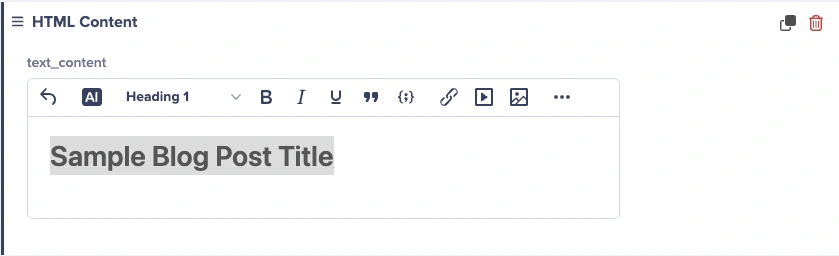
Text component
Our Text component can be one field — a WYSIWYG field.
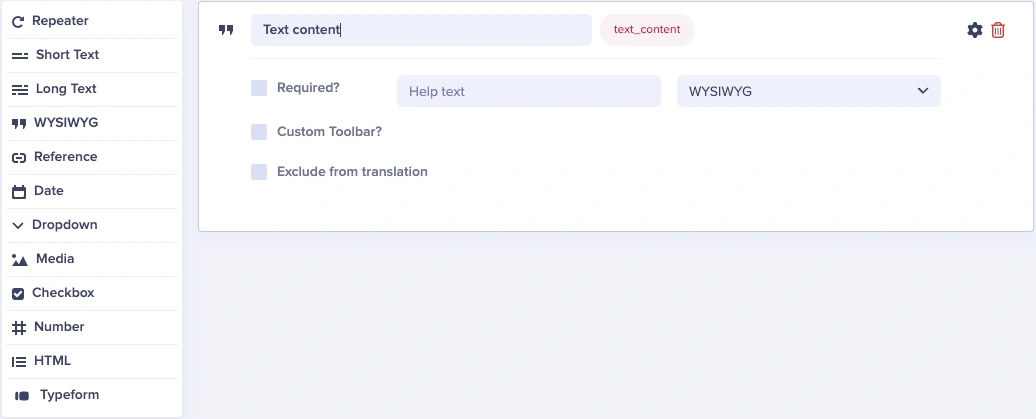
We named the field Text Content , but you can name it to something different.
By clicking the second checkbox, you can also customize the toolbar to allow/disallow the usage of certain formats and options. You can learn more about customizing the toolbar here.
Once added and styled on the frontend, your component could look like this:
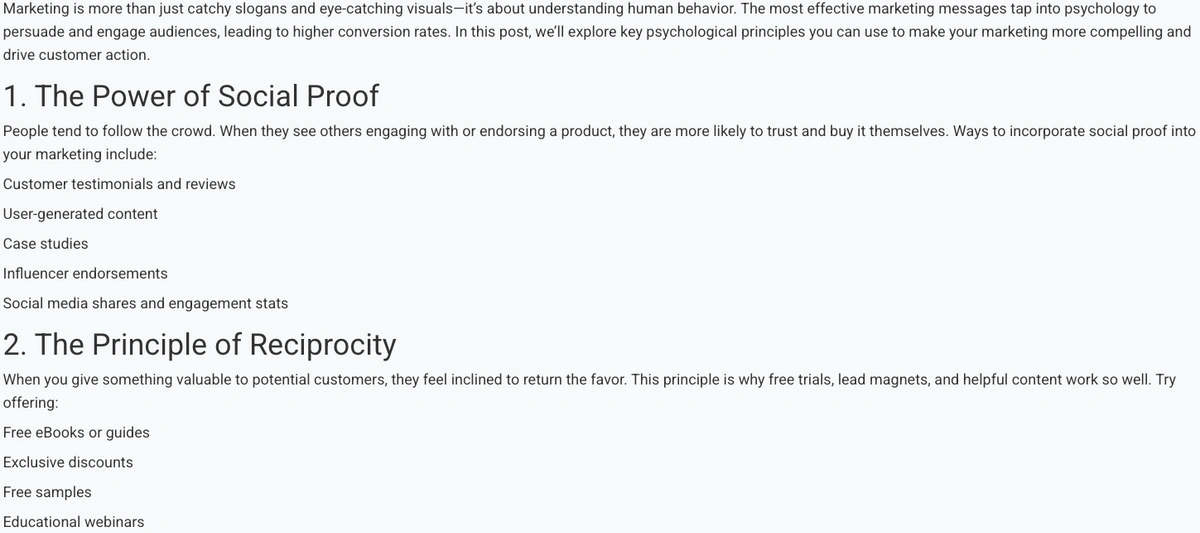
Image component
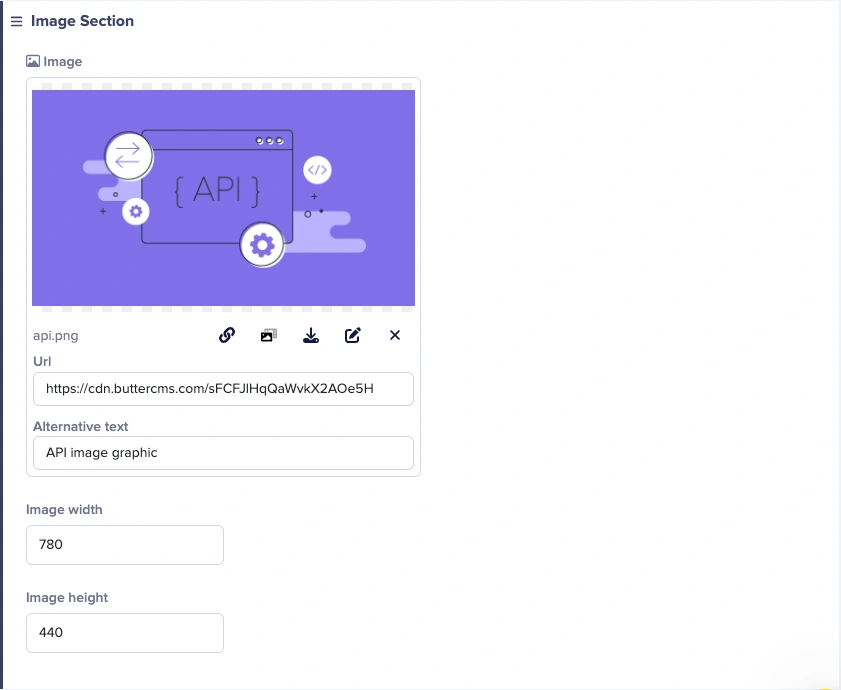
Our Image component will only have a few fields.
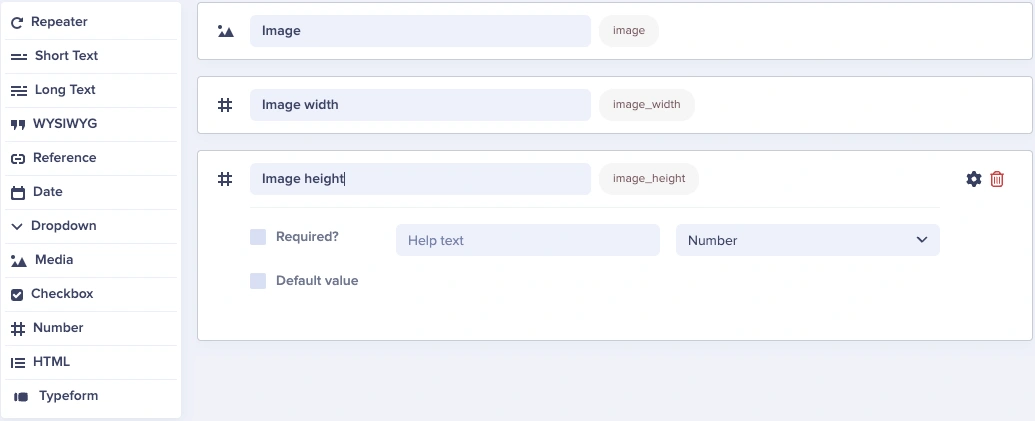
We only need three fields for our Image component:
- A Media field.
- A Number field to define our image’s width.
- A Number field to define our image’s height.
Tip: Having image width and height dimensions impact site performance and SEO as it can affect the layout shift of content across device screen sizes. Images should always be properly sized and have height and width attributes set.
In case you missed our product feature updates, you no longer need a Short Text field for your images’s alt text. You can set it along with the image, you can read more about it here.
Once added and styled on the frontend, your component could look like this:

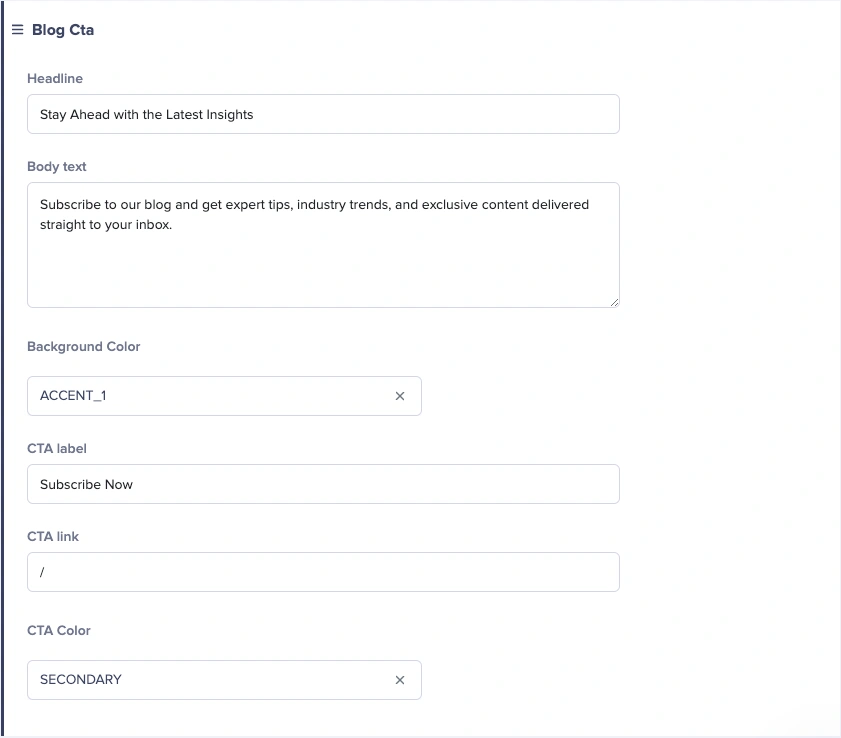
Blog CTA component
Finally, our Blog CTA component. This component will be a little more involved as we use Collections for brand colors. As you may recall, earlier in this guide, one of the common use cases for Collections is tagging and taxonomy.
It’s a best practice to use Collections for brand color management as a way to provide guidelines to your team. With a color picker, it’s very easy to move outside of the boundaries of your brand and picking off-brand colors. This could also have a negative impact on your accessibility scoring for your website or app if the color contrast is not high enough.
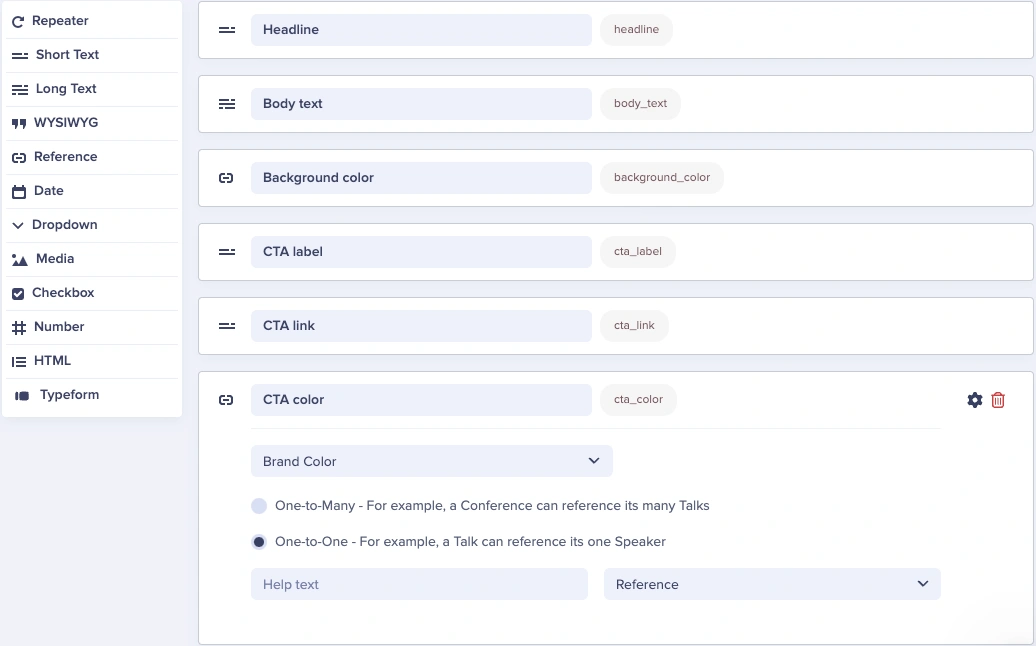
Our component’s fields are:
- A Short Text field for the CTA headline
- A Long Text field for the CTA body text.
- A Reference field to reference our Brand Color collection.
- We’re using the
One-to-Oneradio selection because this only needs to be single select.
- We’re using the
- A Short Text field for our CTA button’s label/text.
- A Short Text field for our CTA button’s link.
- A Reference field to reference our Brand Color collection.
- Once again we only want this field to be a single select. So we’re using the
One-to-Oneradio selection.
- Once again we only want this field to be a single select. So we’re using the
Once added and styled on the frontend, your component could look like this:

Step 3 — Create a new page type
Now that we have created our collections and components, we can start working on our new page type for blog posts.
Navigate to your Content Types page, click on the New Content Type button, and select the Page Type option.
Follow these next steps to create your new custom blog page type.
1. Add your SEO component
Click on the component field option.

Click on the Add from Library button.

Click on the SEO component that you created from your Component Library.

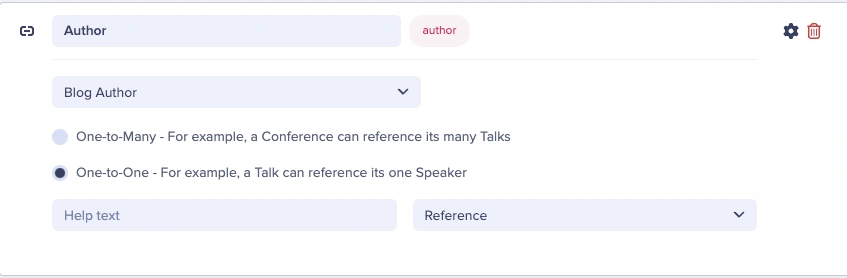
2. Add reference fields to your collections
Now, we’re going to add Reference fields and have them reference our collections for authors, categories, and tags.
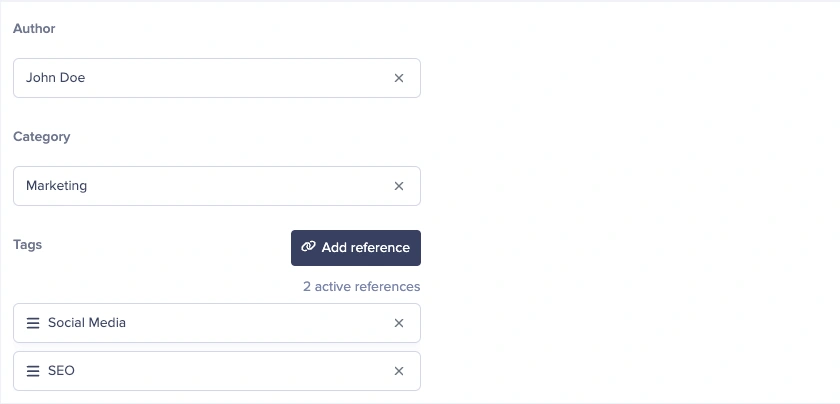
Author
Please note, if you expect that your blog posts will have more than one author sometimes. You can select the One-to-Many radio option.
Category
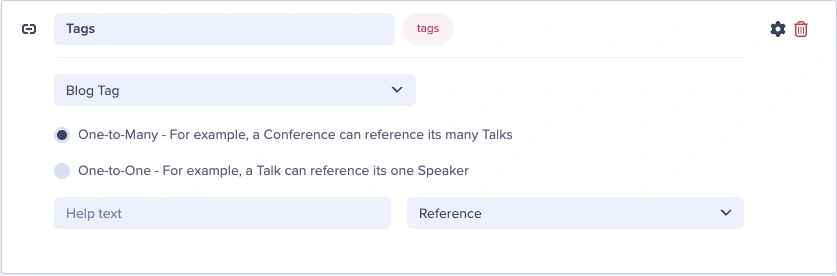
Please note, if you expect that your blog posts will have more than one category sometimes. You can select the One-to-Many radio option.
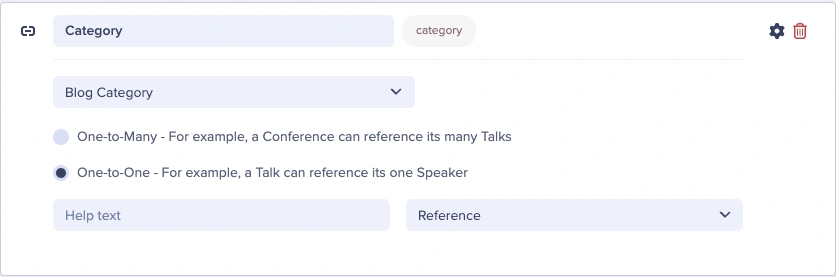
Tags
3. Adding a Component Picker
ButterCMS has a concept called Component Picker. A Component Picker is a list of components that you or anyone on your team has allowed to be used within a specific page type. This is a way of enforcing some quality assurance for any content creators creating pages. For instance, if you’re build a careers page, it may not be necessary for blog post slider component to be present on that page.
Recall, how we added the SEO component to our page schema. We’re going to follow similar steps.
Add the Component Picker
Click on the second option from the top called Component Picker.
This will add the component picker to your page schema, like this:

Next, give the field a name. We’re going to name it Body.
Now, click on the Add from Library button and select the components that you created.
Our Component Picker looks like this:
And that’s it, we have completed the construction of our new blog page type.
Step 4 — Adding content
If you haven’t done so already, start adding some content into your collections and then create a sample blog post using our newly created page type.
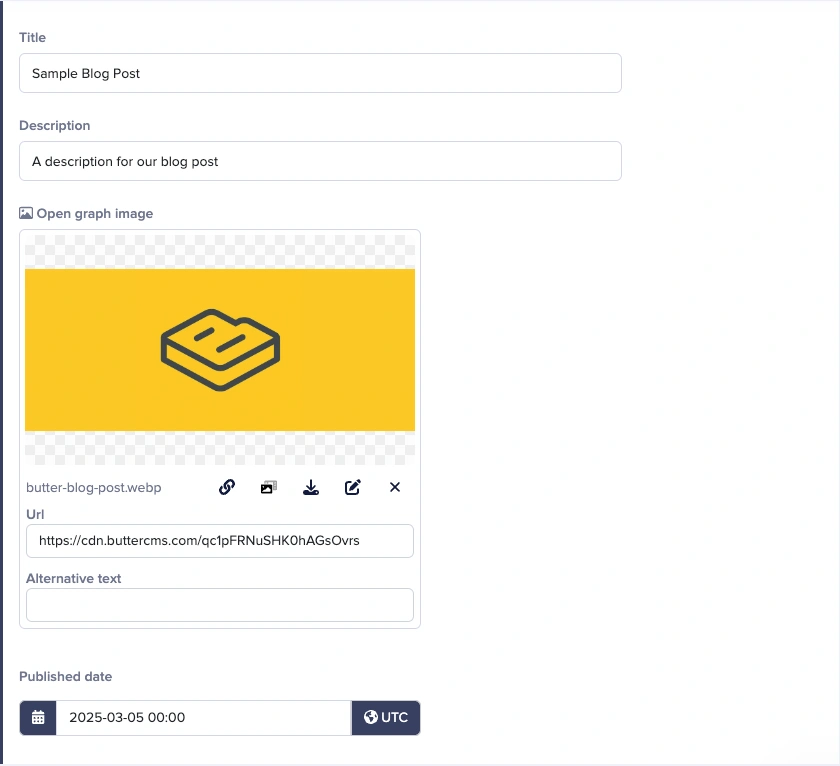
First, we added some SEO content.
Next, we added some metadata for the blog post — author, category, and tags.
Finally, we added our components to add content to the page.
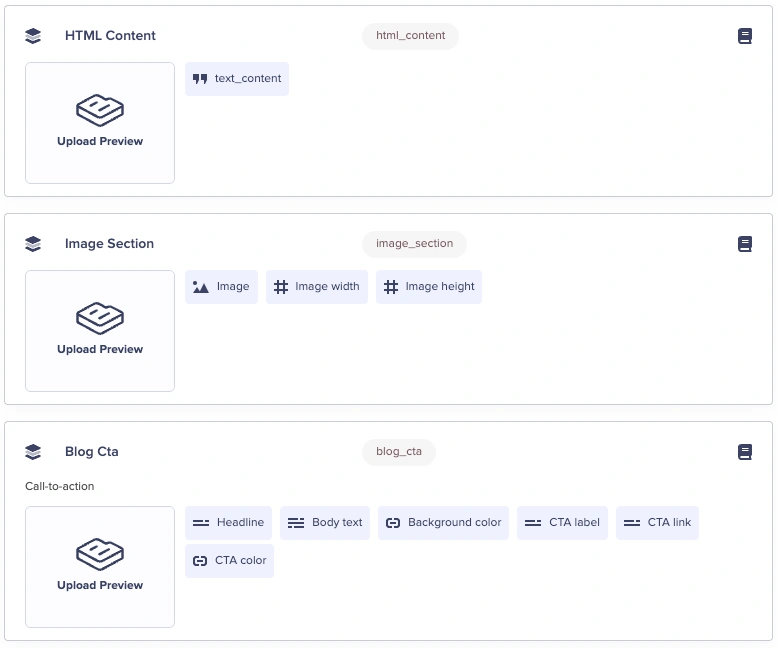
Our Text Component:
Our Image Section component:
Our Blog CTA component:
Closing thoughts
With your new blog page type schema, collections, and components in place, you are now ready to migrate your content from the Blog Engine to a fully customizable and dynamic blog experience. By leveraging ButterCMS’s flexible architecture, you can enhance your blog’s design, improve content organization, and create a more engaging user experience. Whether you’re optimizing for SEO, structuring content for personalization, or integrating interactive elements, this approach ensures your blog meets both business needs and user expectations. As you continue refining your setup, remember that ButterCMS’s tools allow for seamless iteration and scalability, enabling your content strategy to evolve alongside your brand. Happy building!