GSD
How to Add a Blog to Your Ionic App with ButterCMS
Posted by Jerry Ejonavi on October 17, 2023
In today’s world, people consume digital content using different channels and in different ways. Mobile is currently one of the most popular channels, with a larger number of users consuming digital content on their phones compared to desktops, and an even larger number using apps compared to websites.
It makes sense, therefore, to place a higher priority on delivering content to mobile devices via native mobile apps, but it isn’t always technically feasible to do so. Thankfully, hybrid frameworks that make it easier to develop mobile apps exist these days.
In today’s guide, I’ll introduce you to ButterCMS and Ionic Framework, and show you why they are great tools for building mobile apps with dynamic content by building a blog.
Table of contents
Tutorial prerequisites
- Knowledge of JavaScript, Angular, and TypeScript (optional) to follow along with the code
- Node and either npm or yarn installed on your computer
- An active account with ButterCMS (New accounts have a free trial period of 30 days.)
Why use Ionic?
Ionic is a UI toolkit for building cross-platform mobile apps using web technologies, namely HTML, CSS, and JavaScript. Ionic fully adopts a bring-your-own-framework approach thanks to using web components for designing its core components. This means you can add Ionic to your existing JavaScript project, whether you’re working with vanilla JavaScript, React, Angular, Vue, or any other JavaScript framework.
With an increasing library of well-designed and adaptive UI components and a rich library of plugins providing native functionality (via Cordova & Capacitor), Ionic positions itself as a leading option for mobile application development.
Why use ButterCMS?
ButterCMS is a headless CMS and content API for teams and individuals looking to build digital experiences rapidly. Managing your content and developing your project with ButterCMS is fast, thanks primarily to its flexible and easy-to-use content API, as well as support for just about any programming language.
Using a headless CMS like ButterCMS gives you the freedom to focus on delivering your content to your users however you would like to do so. You only have to create your content once, and you can display it on a variety of devices including a website or, as you’ll see in this guide, a mobile app.

Building a blog with Ionic framework and ButterCMS
Ionic can be added to an existing JavaScript project or set up from scratch using the Ionic CLI tool. Adding Ionic to an existing project is as easy as adding the @ionic/core package to your project’s dependencies or including some static files using a CDN. However, for the purpose of this guide, we’ll make use of the CLI to build our Ionic project.
Installing Ionic
The Ionic CLI can be used to quickly generate Ionic projects using Angular, React, or Vue. You’ll need to have the CLI installed as a global dependency on your computer, so as to enable you to start and manage your Ionic projects from anywhere on your computer.
To install the CLI, run the following command in your terminal:
# using npm
npm install -g @ionic/cli
# using yarn
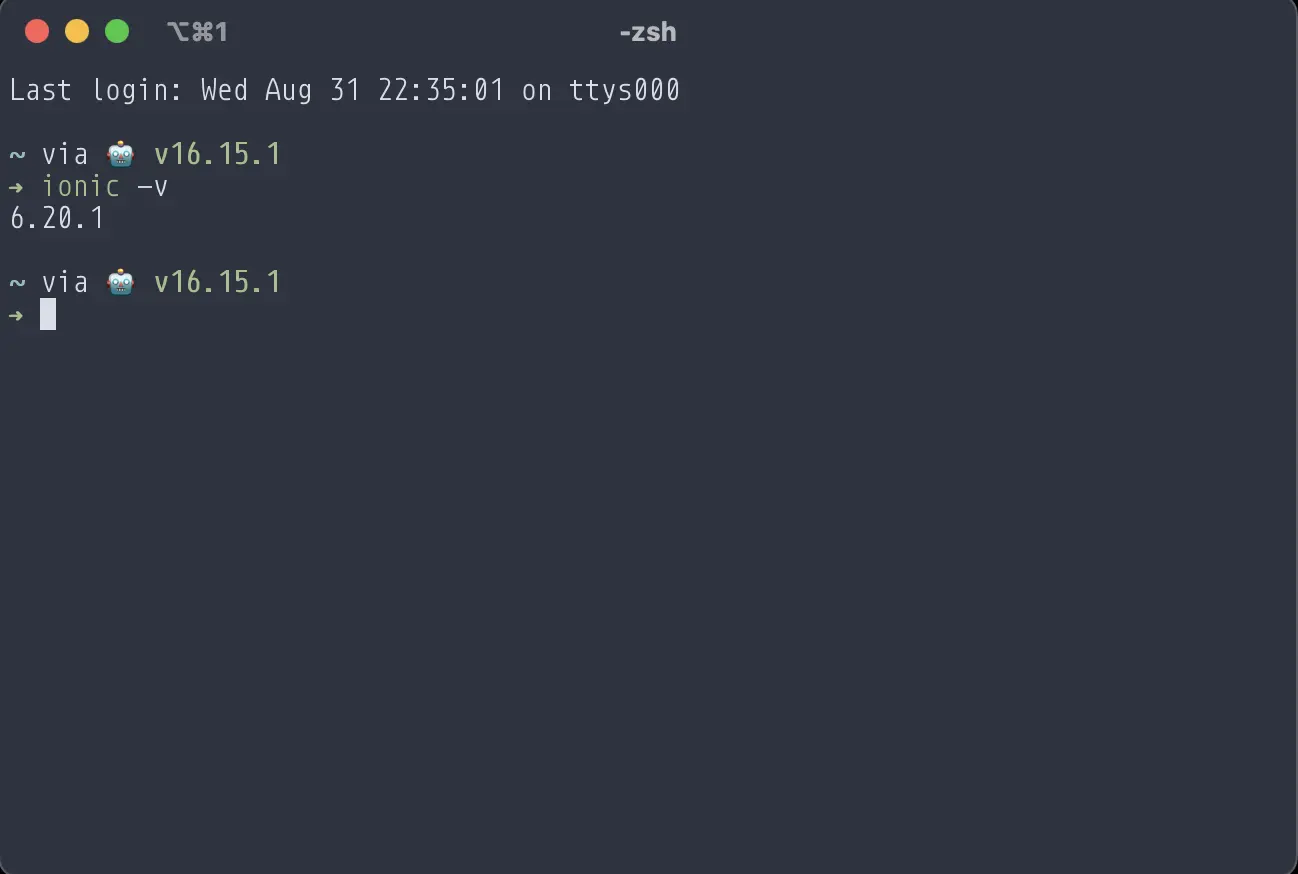
yarn global add @ionic/cliYou can confirm that the installation was successful by running ionic -v in your terminal. This should output a version number, for example:
Creating an Ionic Project
You can create a new Ionic project with the ionic start command. Running the command without any options will take you through a series of prompts for your preferred framework and project template. If you’d like to skip this step-by-step process, you can pass arguments specifying your project name, preferred framework, and preferred template in this format:
ionic start <appName> <template> --type=<preferredFramework>
For this guide, we’ll use the tabs template with Angular as our framework of choice. You can view all available templates by running ionic start --list in your terminal.
To start a project and follow along, run the following command in your terminal:
ionic start ionicButterCms tabs --type=angular
When the command is completed, navigate to the new created folder on your computer and make the following changes:
- Delete the
src/app/explore-containerfolder together with its contents - Delete the
src/app/tab3folder together with its contents
Next, remove the related imports and usage of the explore-container component and the tab3 page in all files within the src/app folder. Do not forget to remove the “Tab 3” tab button in src/app/tabs/tabs.page.html:
<ion-tabs>

  <ion-tab-bar slot="bottom">
    <ion-tab-button tab="tab1">
      <ion-icon name="triangle"></ion-icon>
      <ion-label>Tab 1</ion-label>
    </ion-tab-button>

    <ion-tab-button tab="tab2">
      <ion-icon name="ellipse"></ion-icon>
      <ion-label>Tab 2</ion-label>
    </ion-tab-button>

-    <ion-tab-button tab="tab3">
-      <ion-icon name="square"></ion-icon>
-      <ion-label>Tab 3</ion-label>
-    </ion-tab-button>
  </ion-tab-bar>

</ion-tabs>
You can test that everything works correctly at any point in this tutorial by running ionic serve from your project’s root directory. This command starts a development server and opens http://localhost:8100 in your default browser.
Connecting to ButterCMS
With the Ionic project set up, it’s time to connect to the ButterCMS API and pull content into your Ionic application. You only need to have an API key, issued when you sign up for Butter, in order to query ButterCMS’s API.
While we’ll be making use of the JavaScript helper client in this guide, it’s entirely optional as you can easily query the REST-based API directly.
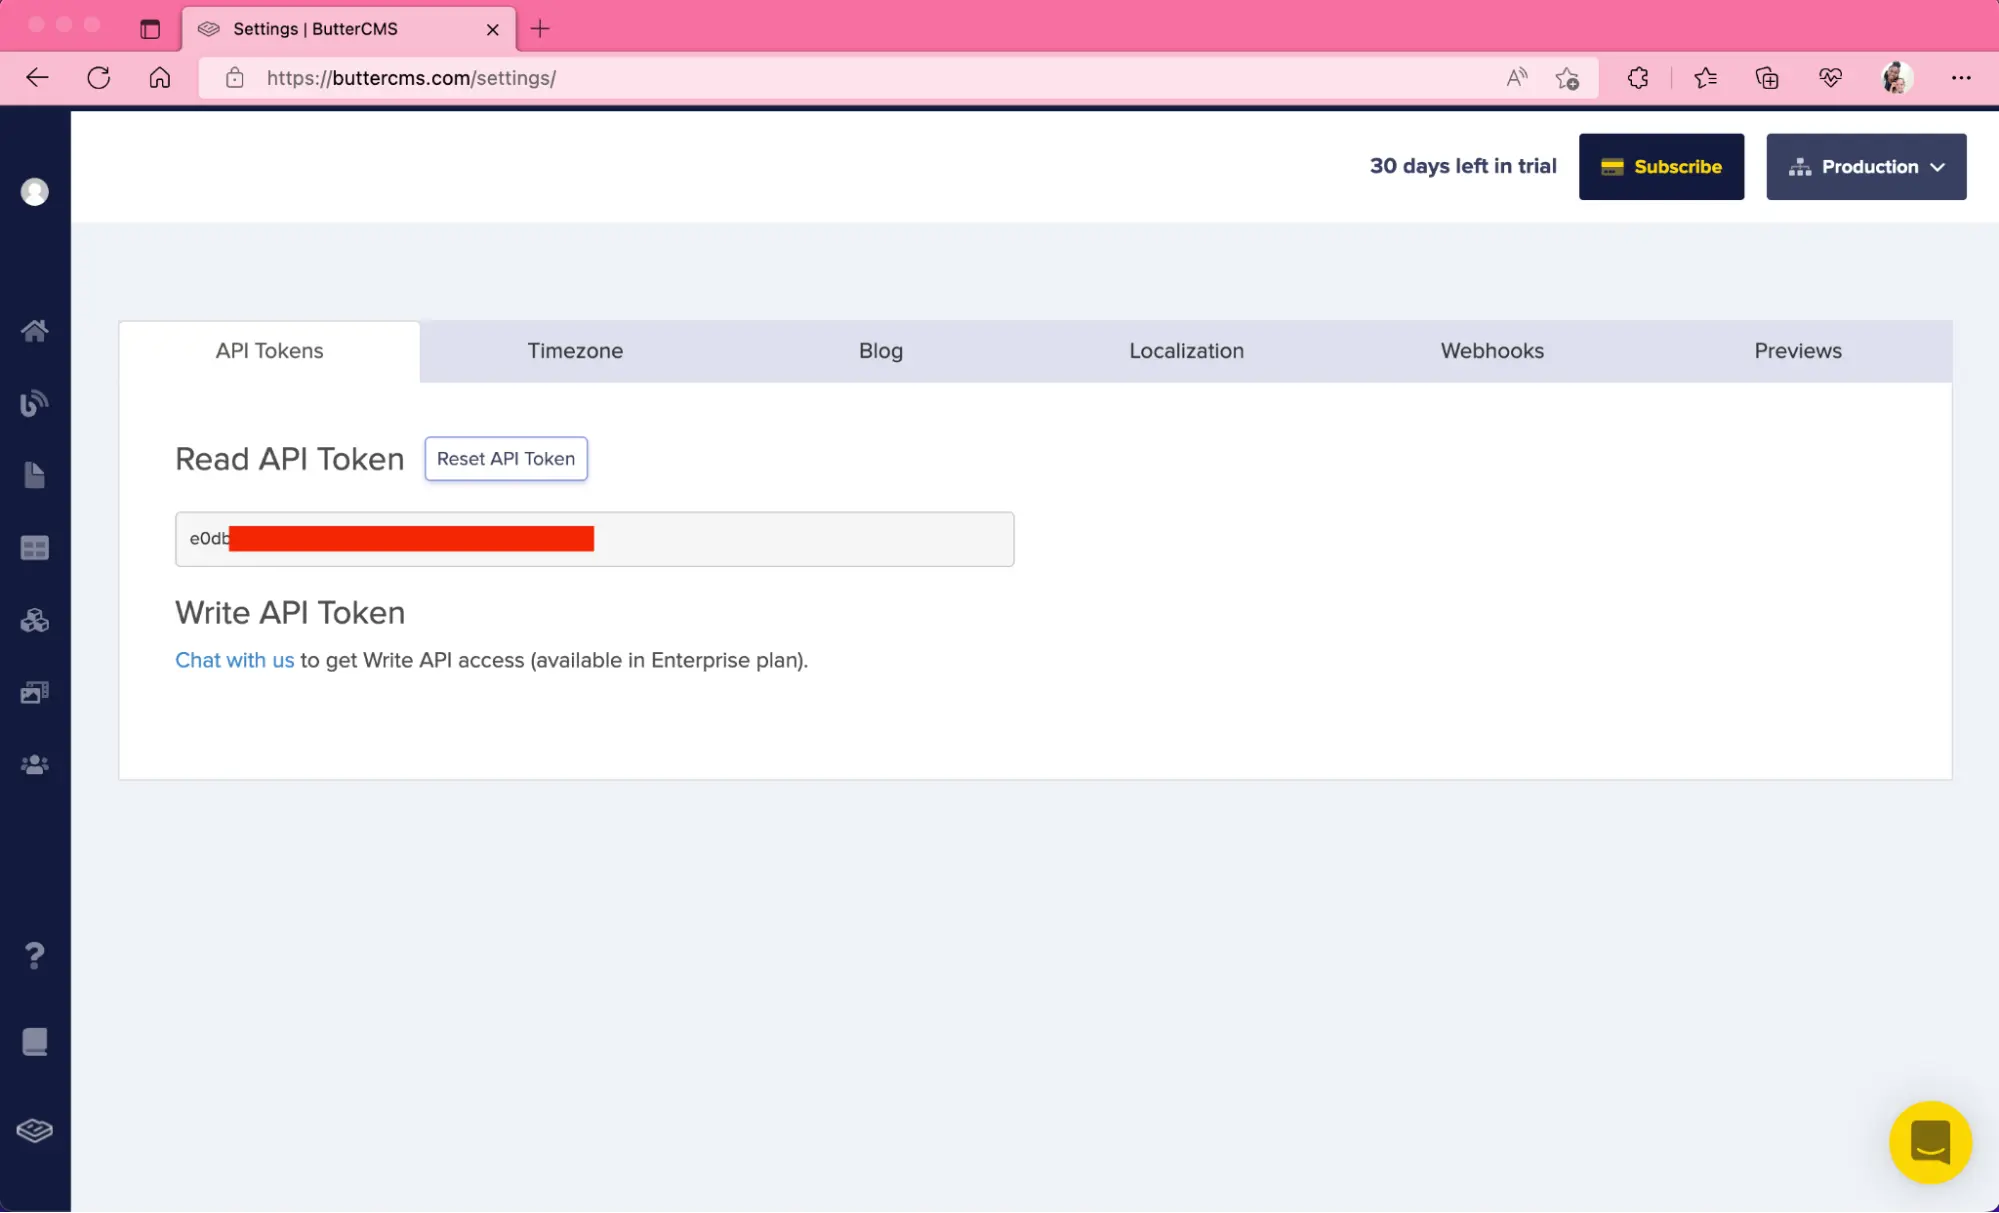
To get your API key, log in to the ButterCMS Dashboard and navigate to https://buttercms.com/settings/ and copy the “Read API Token” string. Keep it handy as you’ll be making use of it soon.
In your Ionic project, add buttercms to your dependencies:
# using npm
npm install --save buttercms
# using yarn
yarn add buttercmsNext, create a service that will contain code for querying the API. You can use the Ionic or Angular CLI to quickly do this.
Open a terminal in your project’s root directory and run the following command to generate the service using the Angular CLI:
ng generate service services/cms
Next, open the generated file and add the code necessary to initialize a Butter client:
import { Injectable } from '@angular/core';
+ import Butter from 'buttercms';

@Injectable({
  providedIn: 'root'
})
export class CmsService {
+ private butterClient = Butter('YOUR-API-KEY-HERE');
  constructor() { }
}
You can now add methods to query the ButterCMS API and retrieve content for your application:
import { Injectable } from '@angular/core';
import Butter from 'buttercms';
+ import { from } from 'rxjs';
+ import { map } from 'rxjs/operators';

+ const extractDataProp = map((data: Butter.Response) => data.data);

@Injectable({
  providedIn: 'root'
})
export class CmsService {
  private butterClient = Butter('YOUR-API-KEY-HERE');
  constructor() { }

+  public getAllPosts(page = 1, page_size = 10) {
+    return from(
+      this.butterClient.post.list({ page, page_size, exclude_body: true })
+    ).pipe(extractDataProp);
+  }

+  public getSinglePost(slug: string) {
+    return from(
+      this.butterClient.post.retrieve(slug)
+    ).pipe(extractDataProp);
+  }

+  public searchByKeyword(query: string, page = 1, page_size = 10) {
+    return from(
+      this.butterClient.post.search(query, { page, page_size, exclude_body: true })
+    ).pipe(extractDataProp);
+  }
}
There are a couple of things to note here.
First, the JavaScript client library is Promise-based. The from function converts the response from each client method from a Promise to an Observable, while the extractDataProp function returns the data property from the response so we can work with it directly.
Second, there are three methods: one that retrieves a list of posts (with parameters for paginating the response), another that retrieves details for a single post and, finally, one that allows us to implement search in our application.
Lastly, we’ve added a parameter to the method that retrieves a list of posts - exclude_body: true - which keeps the size of the response small by excluding the main content of posts from the response data.
In the next sections, you’ll begin to query data from the ButterCMS API by injecting the newly created service into your page component files.
Rendering posts from ButterCMS
The service you created earlier exposes three methods for querying data from ButterCMS. We’ll make use of two of those methods in this section. By the end of this section, you should be able to browse a list of posts from your ButterCMS instance, and view details of single posts in a separate page.
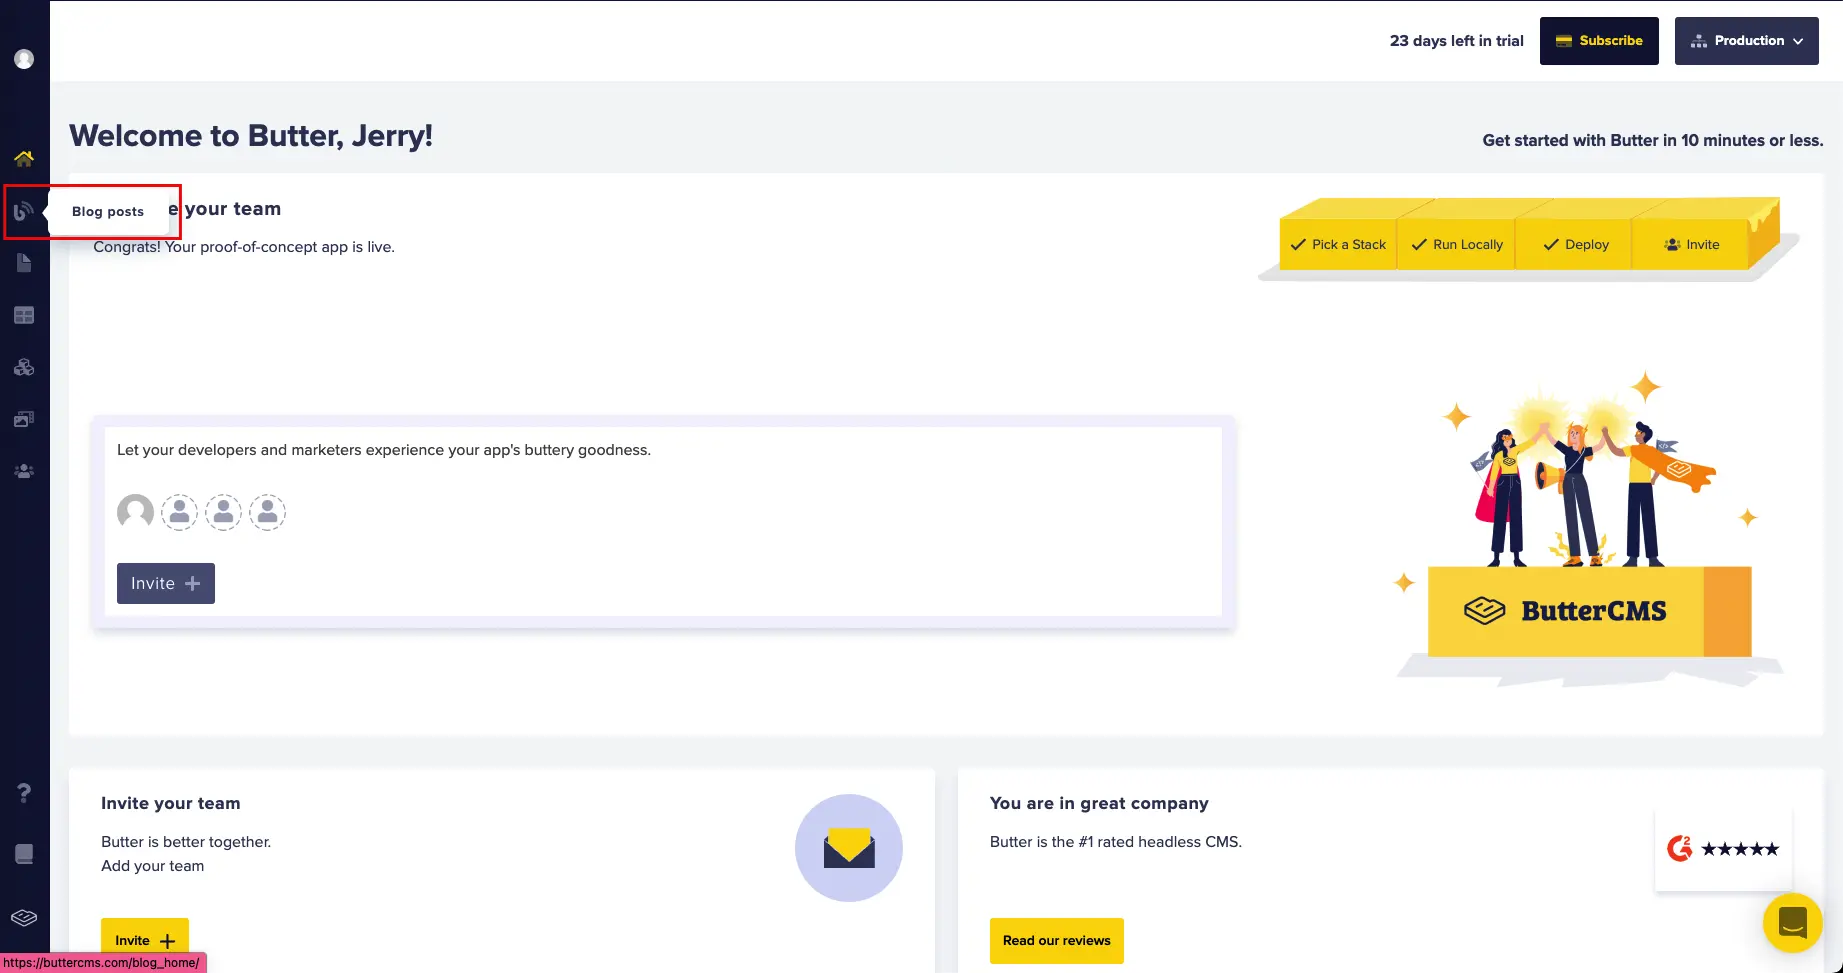
To get started, we’ll need to create blog posts using the Butter blog engine. Log in to the ButterCMS dashboard using your account, then navigate to “Blog Posts” from the side navigation menu.
Click “New post” from the Blog posts screen and add your post content - title, body with the WYSIWYG editor, featured images - in the page that loads next.
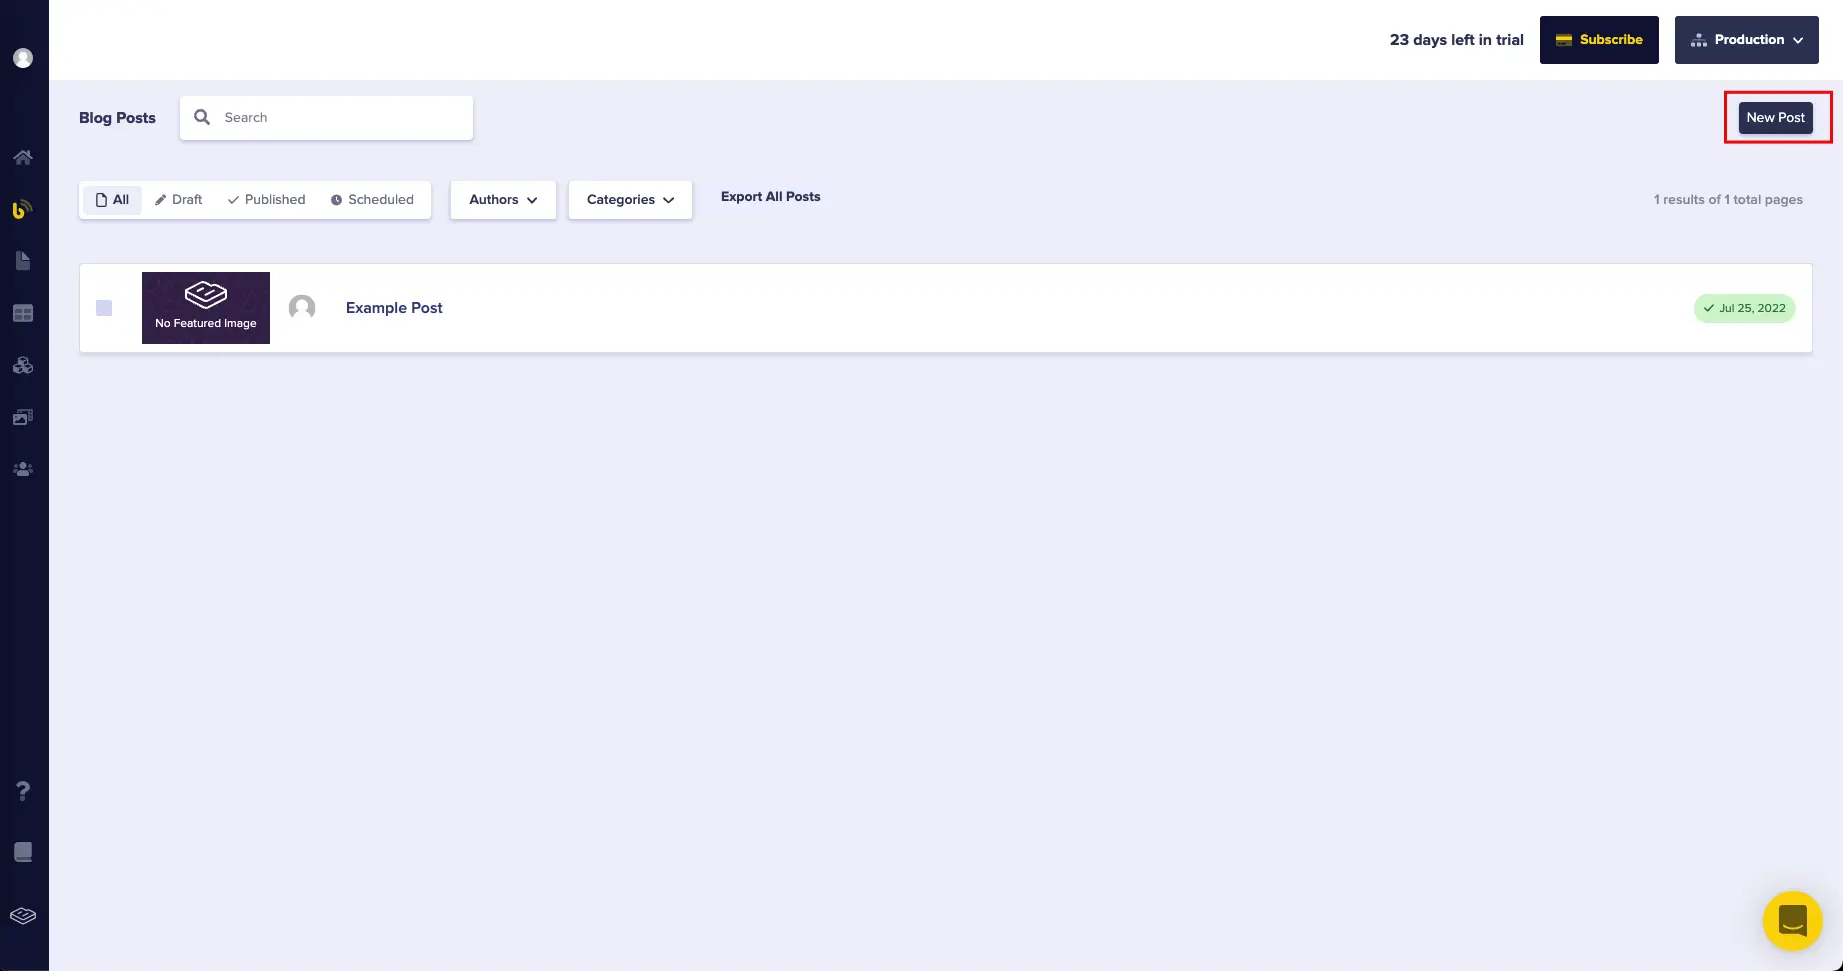
In this WYSIWYG editor, you can add your blog content, metadata, and SEO data.
Hit “Publish” when you’re ready for your post to go live, or “Save Draft” if you’d like to save your progress and continue editing at another time. Take a few minutes to add some posts with dummy content and publish them.
Next up for us is retrieving and rendering the just-created posts. We’ll make use of the Tab 1 page for this. Open the src/app/tab1.page.ts file and replace the contents of the file with the following code:
import { Component, OnDestroy, OnInit } from '@angular/core';
import { BehaviorSubject, Subscription } from 'rxjs';
import { CmsService } from '../services/cms.service';

@Component({
  selector: 'app-tab1',
  templateUrl: 'tab1.page.html',
  styleUrls: ['tab1.page.scss']
})
export class Tab1Page implements OnInit, OnDestroy {
  subscription: Subscription;
  posts$ = new BehaviorSubject([]);
  busy = true;
  // pagination can be implemented using the following properties
  currentPage = 1;
  totalPages: number;

  constructor(private readonly cms: CmsService) {}

  ngOnInit() {
    this.subscription = this.cms.getAllPosts(this.currentPage).subscribe({
      next: ({ meta, data }) => {
        // meta contains pagination information
        this.busy = false;
        this.posts$.next(data);
      }
    });
  }

  ngOnDestroy(): void {
    this.subscription?.unsubscribe();
  }

}
Then replace the contents of the src/app/tab1.page.html file with the following code:
<ng-template #featuredPostTemplate let-post="post">
  <ion-grid>
    <ion-row>
      <ng-container *ngIf="post.featured_image">
        <ion-col size="12">
          <ion-img [src]="post.featured_image"></ion-img>
        </ion-col>
      </ng-container>
      <ion-col size="12">
        <h2>
          <ion-text>{{ post.title }}</ion-text>
        </h2>
      </ion-col>
    </ion-row>
  </ion-grid>
</ng-template>

<ion-header [translucent]="true">
  <ion-toolbar>
    <ion-title>My Feed</ion-title>
  </ion-toolbar>
</ion-header>

<ion-content [fullscreen]="true">
  <ion-header collapse="condense">
    <ion-toolbar>
      <ion-title size="large">My Feed</ion-title>
    </ion-toolbar>
  </ion-header>

  <ng-container *ngIf="busy">
    <div class="ion-text-center">
      <ion-spinner></ion-spinner>
    </div>
  </ng-container>

  <ng-container *ngFor="let post of posts$ | async; let i = index">
    <ion-item
      detail="false"
      [routerLink]="'/post/' + post.slug"
      class="ion-margin-vertical"
    >
      <ng-container *ngIf="i === 0; else defaultPostTemplate">
        <ng-container
          *ngTemplateOutlet="featuredPostTemplate; context: { post: post }"
        ></ng-container>
      </ng-container>

      <ng-template #defaultPostTemplate>
        <ion-label>
          {{ post.title }}
          <br />
          <small>{{ post.summary }}</small>
        </ion-label>
        <ng-container *ngIf="post.featured_image">
          <ion-thumbnail slot="end">
            <ion-img [src]="post.featured_image"></ion-img>
          </ion-thumbnail>
        </ng-container>
      </ng-template>
    </ion-item>
  </ng-container>
</ion-content>
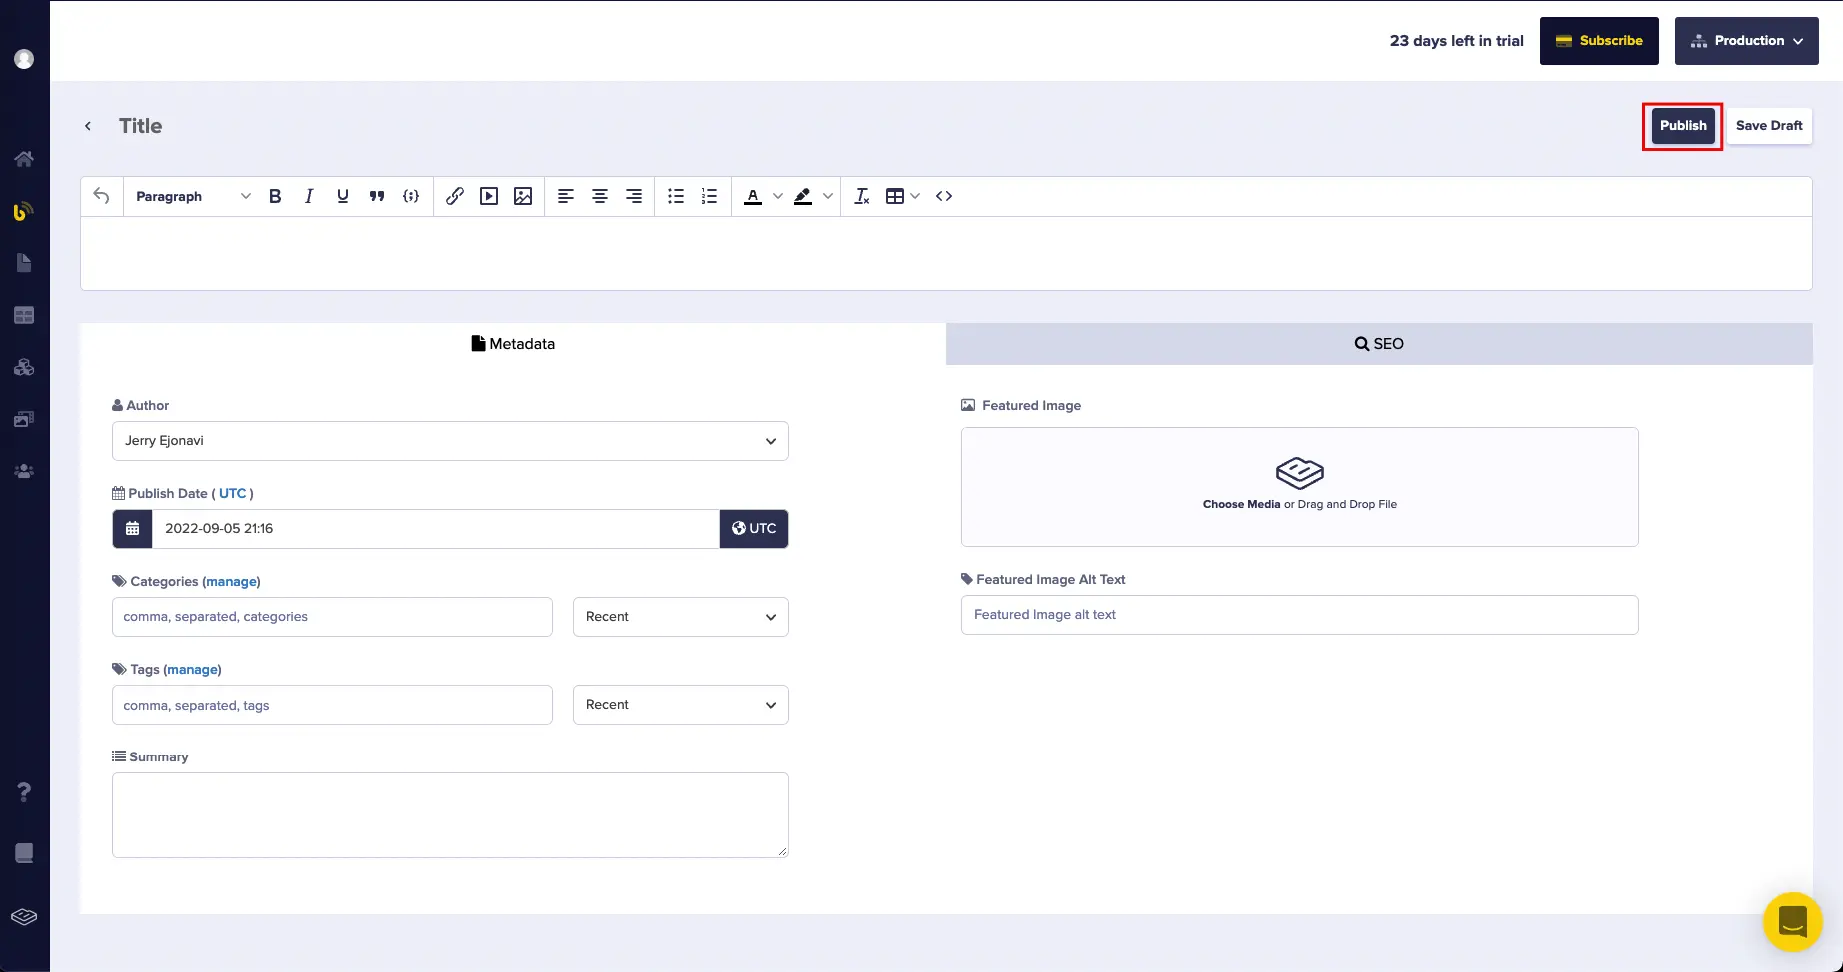
If you aren’t familiar with Ionic or Angular, this might seem a bit confusing at first glance. Let’s try to break it down block by block.
First, we have a template which is only rendered when a post is considered to be a featured post. You can set this to any criteria, for example using certain Tags from the ButterCMS Blog Engine. For the purpose of this guide, only the first post in the list is rendered using the featured post template.
Next, in the main content area, we render a loading icon using the ion-spinner component when we’re making a network request.
Finally, we render the list of posts using the *ngFor directive and async pipe.
Note the ng-container element we use to conditionally render a featured post, and the default post template for all other posts. Also note how by making use of various Ionic components we are able to get a great-looking (if basic) UI without needing to write CSS ourselves.
If you try tapping any of the tiles at this point, you’ll get an error in your browser console because the route we’re trying to link to hasn’t been handled in code yet:
<ion-item
  detail="false"
  [routerLink]="'/post/' + post.slug"
  class="ion-margin-vertical"
>
  <!-- Code hidden for simplicity -->
</ion-item>
Let’s fix this by first generating the page where we’ll route to using the Ionic CLI:
ionic generate page post
Next, update the src/app/post/post-routing.module.ts file to accept post slugs as a path parameter:
const routes: Routes = [
  {
-   path: '',
+   path: ':slug'
    component: PostPage
  }
];
Next, replace the contents of the src/app/post/post.page.ts file with the following code:
import { Component, OnInit } from '@angular/core';
import { ActivatedRoute } from '@angular/router';
import { NavController, ToastController } from '@ionic/angular';
import { Subscription } from 'rxjs';
import { CmsService } from '../services/cms.service';

@Component({
  selector: 'app-post',
  templateUrl: './post.page.html',
  styleUrls: ['./post.page.scss'],
})
export class PostPage implements OnInit {
  slug: string;
  post: Record<string, unknown>;
  busy = false;
  subscription: Subscription;

  constructor(
    private readonly route: ActivatedRoute,
    private readonly cms: CmsService,
    private readonly toast: ToastController,
    private readonly navCtrl: NavController
  ) {}

  ngOnInit() {
    this.route.paramMap.subscribe({
      next: (params) => {
        this.slug = params.get('slug');
      },
    });
  }

  ionViewWillEnter() {
    if (this.slug) {
      this.busy = true;
      this.fetchPostInformation();
    }
  }

  ionViewDidLeave() {
    this.subscription?.unsubscribe();
  }

  navigateBack() {
    this.navCtrl.back();
  }

  fetchPostInformation() {
    this.subscription = this.cms.getSinglePost(this.slug).subscribe({
      next: (response) => {
        this.post = response.data;
        this.busy = false;
      },
      error: () => {
        this.busy = false;
        this.showErrorToast();
      },
    });
  }

  async showErrorToast() {
    const toast = await this.toast.create({
      message: 'Something went wrong. Please try again.',
      color: 'light',
      buttons: [
        {
          text: 'Dismiss',
          role: 'cancel',
        },
      ],
    });
    toast.present();
  }
}
Here, we’re extracting the slug parameter from the current route information and using the slug - if it exists - to fetch details for the post. If the request fails, we use the Ionic Toast component to let the user know there was an error.
Finally, render the post by replacing the contents of the src/app/post/post.page.html file with the following code:
<ion-header>
  <ion-toolbar>
    <ion-buttons slot="start">
      <ion-button fill="clear" (click)="navigateBack()">
        <ion-icon slot="icon-only" name="arrow-back-outline"></ion-icon>
      </ion-button>
    </ion-buttons>
  </ion-toolbar>
</ion-header>

<ion-content class="ion-padding">
  <ng-container *ngIf="post; else busyOrError">
    <h1>{{ post.title }}</h1>
    <article class="ion-padding-top" [innerHTML]="post.body"></article>
  </ng-container>

  <ng-template #busyOrError>
    <div class="ion-text-center">
      <ion-spinner *ngIf="busy; else error"></ion-spinner>

      <ng-template #error>
        <ion-text
          >This is embarrassing. You asked for some data, but we could not
          provide it. Please try again or go back to the previous
          page.</ion-text
        >
      </ng-template>
    </div>
  </ng-template>
</ion-content>
At this point, you should be able to easily navigate between the page with the list of posts and the page showing details for a particular post.

Searching and Filtering Posts
To demonstrate how powerful ButterCMS is and how easy it is to work with, we’ll implement search in our Ionic app using the searchByKeyword() method we added earlier.
The search() method from the JavaScript client returns an array of posts with title or content matching the search query. This is quite similar to the response from the list() method, so we can implement searching through posts like we implemented browsing through posts.
To start with, replace the contents of the src/app/tab2/tab2.page.ts file with this code:
import { Component } from '@angular/core';
import { Router } from '@angular/router';
import { BehaviorSubject, Subscription } from 'rxjs';
import { CmsService } from '../services/cms.service';

@Component({
  selector: 'app-tab2',
  templateUrl: 'tab2.page.html',
  styleUrls: ['tab2.page.scss'],
})
export class Tab2Page {
  posts$ = new BehaviorSubject([]);
  subscription: Subscription;

  constructor(
    private readonly cms: CmsService,
    private readonly router: Router
  ) {}

  ionViewWillLeave() {
    this.subscription?.unsubscribe();
  }

  search(event: CustomEvent<{ value?: string }>) {
    if (event.detail?.value?.length < 1) {
      this.posts$.next([]);
      return;
    }
    this.cms.searchByKeyword(event.detail.value).subscribe({
      next: (response) => {
        this.posts$.next(response.data);
      },
    });
  }

  viewPost(slug: string) {
    this.router.navigate(['/post', slug]);
  }
}
Then, update your HTML to look like this:
<ion-header [translucent]="true">
  <ion-toolbar>
    <ion-title>Explore</ion-title>
  </ion-toolbar>
</ion-header>

<ion-content [fullscreen]="true">
  <ion-header collapse="condense">
    <ion-toolbar>
      <ion-title size="large">Explore</ion-title>
    </ion-toolbar>
    <ion-toolbar>
      <ion-searchbar
        debounce="500"
        (ionChange)="search($event)"
      ></ion-searchbar>
    </ion-toolbar>
  </ion-header>

  <ion-list>
    <ng-container *ngFor="let post of posts$ | async">
      <ion-item (click)="viewPost(post.slug)">
        <ion-label>{{ post.title }}</ion-label>
      </ion-item>
    </ng-container>
  </ion-list>
</ion-content>
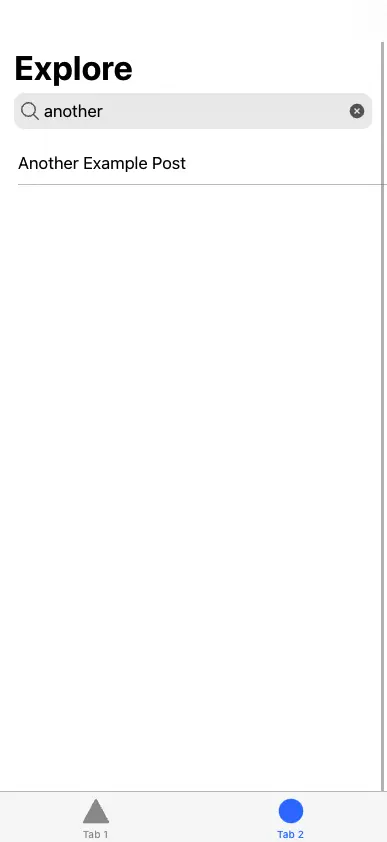
With this change, we’ve been able to render a search bar and, when available, a list of posts matching a user’s search criteria. You can see this in action in the image below, which shows the results for “another”. Of course, tapping a post will take you to the details page for that post.
Wrapping up
That concludes this guide on building a blog using Ionic and ButterCMS. This post only scratches the surface of what can be achieved with both technologies. For example, consider the following list of features you can implement:
- Use Butter’s Webhooks to send notifications to your app’s users each time a new post is published
- Allow users to (locally) save their preferred content categories using Tags
- Allow users to save posts for viewing later - whether they’re offline or online
If you’d like to quickly start building your blog with ButterCMS, sign up for a free account here and use the code used in this guide as a starting point.
ButterCMS is the #1 rated Headless CMS


Related articles
Don’t miss a single post
Get our latest articles, stay updated!
Jerry builds software that (usually) runs in a web browser. In his spare time, he frequently writes about web technologies, plays video games, or watches football.