
GSD
How to Build a Knowledge Base with Laravel and ButterCMS
Posted by Levis Masonde on September 24, 2023
More than 69% of consumers prefer to solve issues on their own. This is in conjunction with the growth in mobile application usage and access to the internet. Customers nowadays prefer to search for a solution online before attempting to call or send an email. Building a knowledge base and maintaining it is the best way to offer your customers self-service. A knowledge base is a centralized database hosting information regarding a product or service meant to be shared and spread to customers and employees.
Less than 30% of companies offer self-service, live chat, social messaging, in-app messaging, bots, or peer-to-peer communities. High performers, according to benchmark data, are 76% more likely to offer self-service. Additionally, half of managers say their team lets agents add to self-service over time, but only a third of support agents say their team has a self-service strategy in place.
Since the majority of companies do not have a self-service strategy, you will gain a great advantage against your competitors. Setting up a knowledge base can be a great first step toward establishing a self-service strategy for both your customers and internal customer support teams.
In this tutorial, you will be utilizing ButterCMS to power a knowledge base web application for a courier company. As a courier company, potential new customers always have a bunch of questions since there are many factors involved in its service. This knowledge base will have important information going over general topics one might have to know when committing to a courier service. This will decrease the need for customers to call or email you directly regarding your services.
Table of contents
Why use Laravel & ButterCMS?
Laravel is a free and open-source PHP framework for web applications. It makes use of controllers, routes and views (also known as MVC architecture) to create dynamic web applications with separate logic for the backend and front-end. The controller initiates the application by making requests to the backend (servers) or acquiring local data and passing the results to a view. The view file will have blade.php as an extension. Blade is Laravel's powerful templating engine that provides features like template inheritance, conditional statements, loops, and more.
ButterCMS is an API-driven content management system. It powers your application’s backend in the cloud. This means you can run a range of applications without having to worry about server hardware, software updates, backups, and uptime. ButterCMS can help you quickly add blog and marketing site capability to any tech stack. And since it’s SaaS, it is only responsible for hosting and maintaining the CMS API (data) and dashboard.
ButterCMS exposes content via an API and the ButterCMS-php client has built-in functions to help developers when making requests to the API. This compliments Laravel’s controllers when making requests to the API. You can learn about the functions and more in the official ButterCMS Laravel documentation. Laravel’s Blade templating engine enables the developer to present arrays of content using simple functions like the @foreeach function on the views. ButterCMS can seamlessly integrate with Laravel's Blade templates, allowing you to retrieve and render content from ButterCMS within your views.
Tutorial: Building a Knowledge Base with Laravel and ButterCMS
What we’ll be building
In this tutorial, you will create a knowledge base using Laravel to build your front-end while the backend will be powered by ButterCMS. The content for the knowledge base will be based on a courier company, while the feel and look of the knowledge base is inspired by Slack’s knowledge base.
By the end of this tutorial, you will have a knowledge base which looks like this:
The rest of the results will be shown at the end of the tutorial. Additionally, the code for this tutorial can be found in this GitHub repo.
Tutorial prerequisites
-
Xampp (v8.2.4)
-
Visual Studio Code (v1.78)
-
Windows 10
-
PHP (v8.1)
-
Composer (v2.5.8)
-
Laravel 9
Building the knowledge base application
Before building the front-end of the application, you will be using ButterCMS to build the structure for the pages of the front-end. ButterCMS makes it easier for a developer to build the front-end since they will essentially have a template for the front-end pages.
Creating knowledge base pages using ButterCMS
In this tutorial, you will be using ButterCMS’ pages and page types to build the overview structure for your application’s web pages and their different sections.
Page types in ButterCMS define the structure and fields that are associated with a specific type of page. They allow you to define a template or schema for a particular type of page.
In this section, you will create three page types, namely:
-
Laravel Articles page type
-
Laravel KB Home page type
-
Laravel Category page type
Since the page on the front-end will feature a menu, let's create a collection for menu items first.
Creating the Navigation Menu Item collection
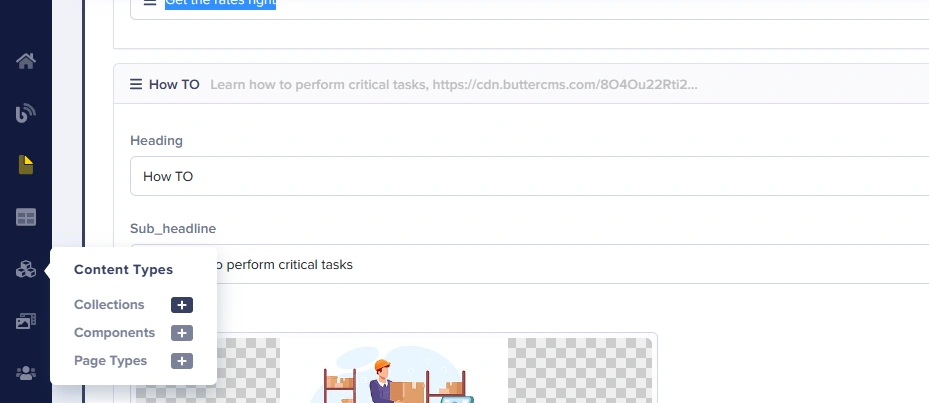
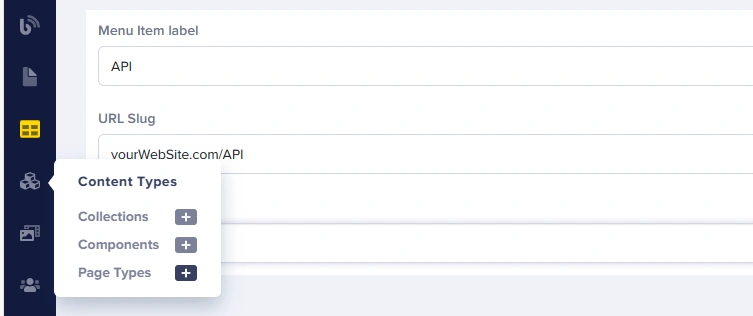
You will have a collection for menu items and a separate one for the complete menu. To start with your first collection, hover over the Content Types icon on the sidebar and click on the + button aligned with Collections.
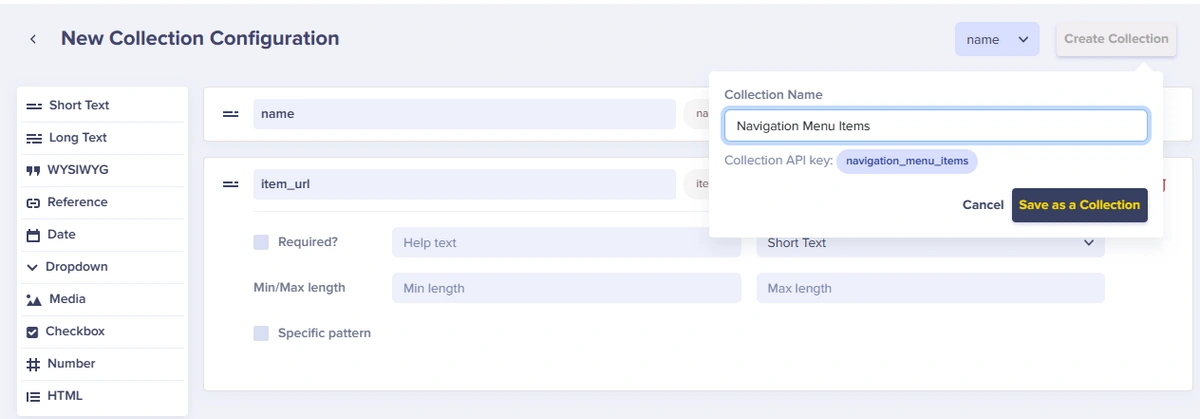
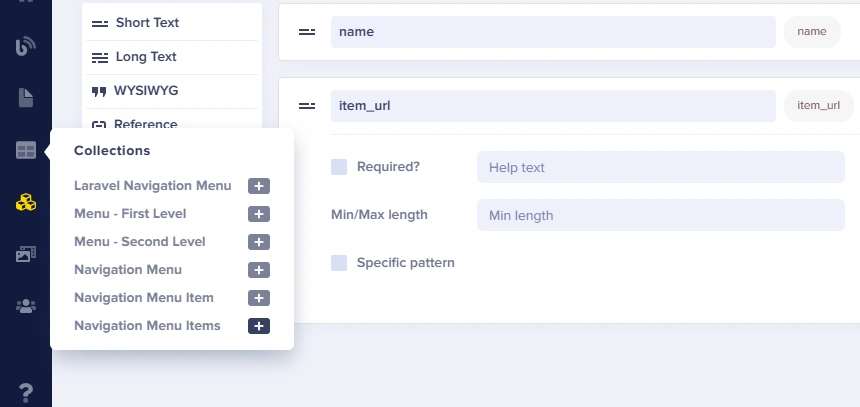
This will lead you to a collection’s schema page. Add the following Content Fields to the schema page:
-
Short text: name
-
Short text: item_url
After adding Content Fields, click on the Create Collection button and name the collection “Navigation Menu Items” then click the Save as a Collection button to save.
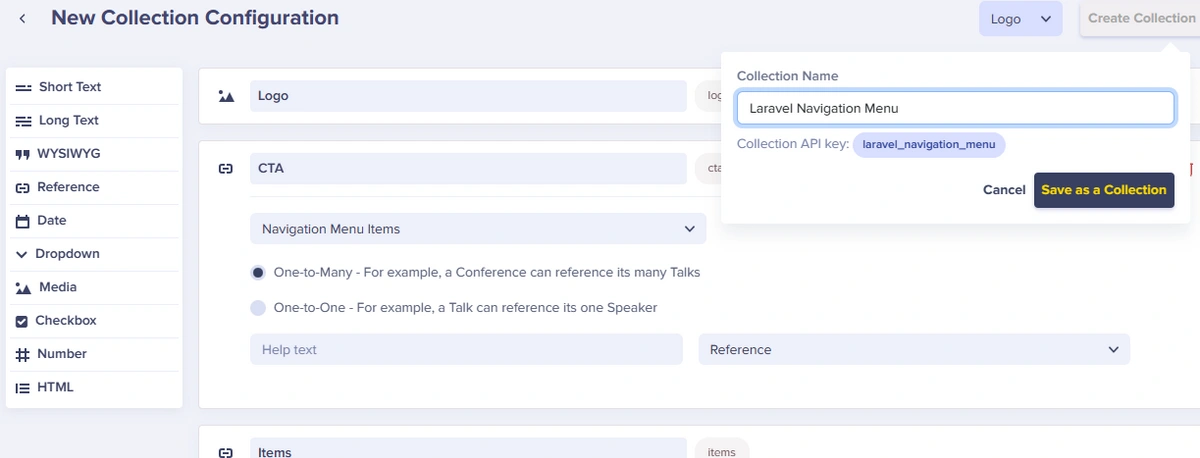
Now, let’s create another collection. Follow the steps above to create a new collection and add the following Content Fields:
-
Media: logo
-
Reference: Items
-
One-to-One relationship with Navigation Menu Items
-
-
Reference: CTA
-
One-to-One relationship with Navigation Menu Items
-
Once you have added the Content Fields, save the collection as “Laravel Navigation Menu”:
Adding content to the Navigation Menu Items collection
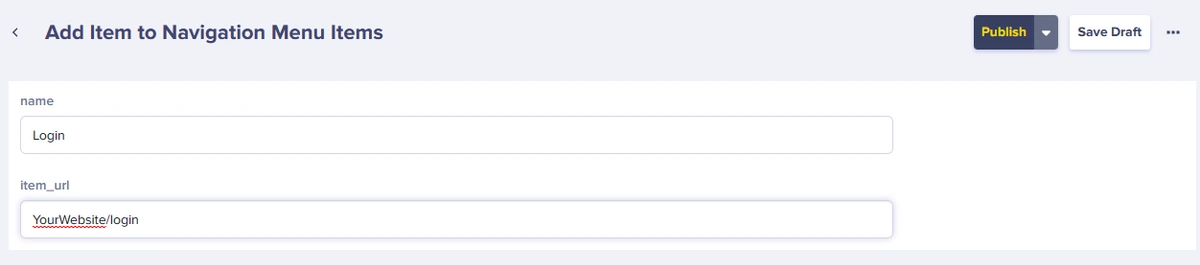
To add content to a collection, hover over the Collections icon on the sidebar and click on + button aligned with Navigation Menu Items:
Once redirected, add the name and item_url then click on the Publish button:
Follow the steps shown above and add another menu item called “Sign Up”.
After adding menu items, hover over the Collections icon and click on the + button aligned with Laravel Navigation Menu:
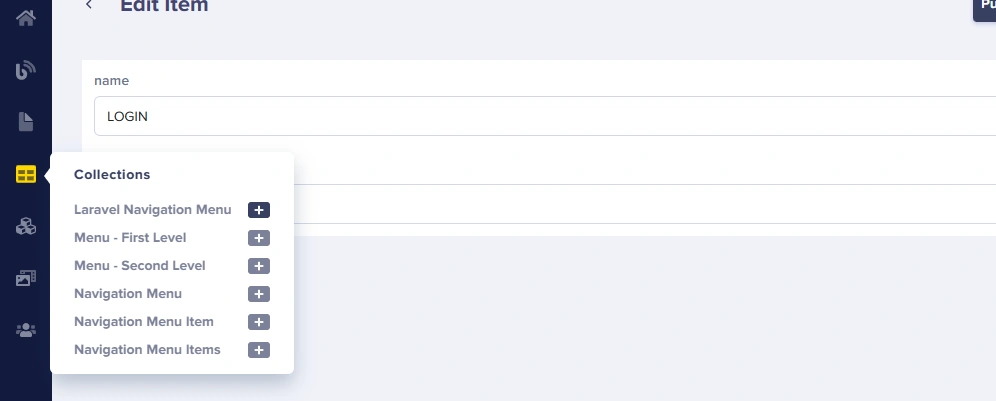
Add content to the collection and add the CTA items:
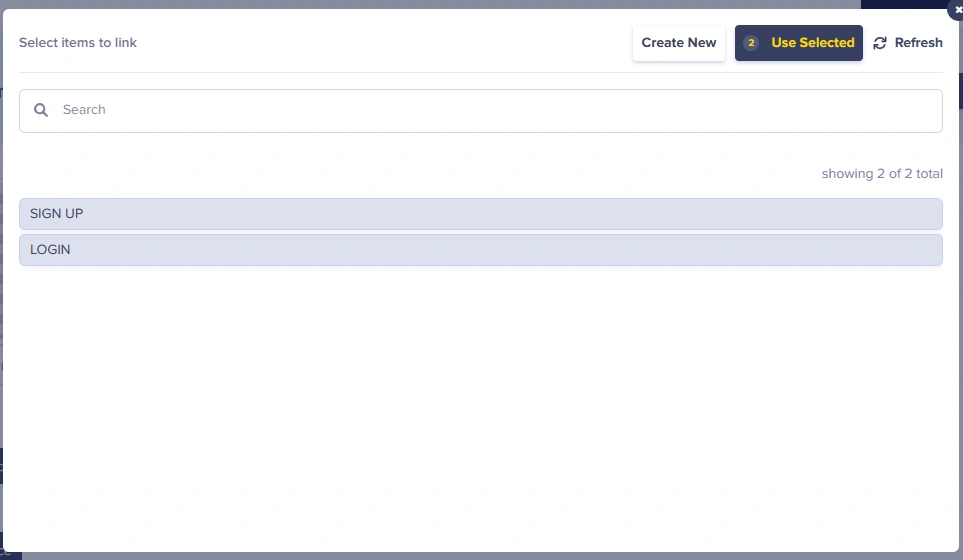
This is how the collection item look like:
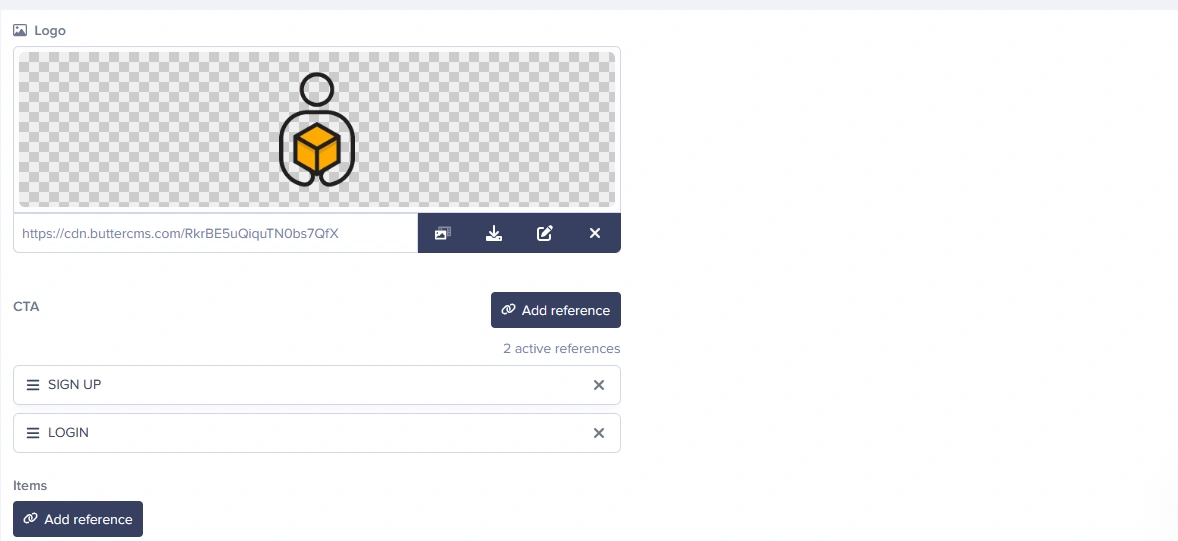
After adding the content, click on the Publish button to publish the collection. Now you can build the page types starting with the Articles page type.
Building the Articles page type
First, let’s create the Articles page type for the articles to be featured in the knowledge base application.
Here, you will be creating a template for your articles using page types. To do this, hover over the Content Types icon on the sidebar and click on the + button aligned with Page Types:
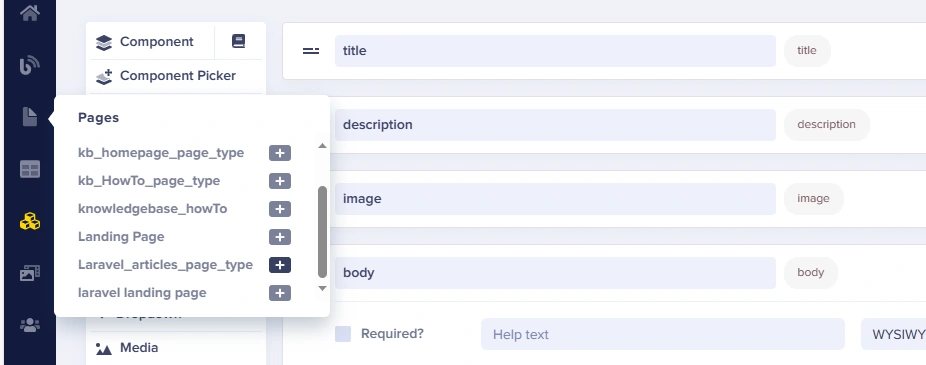
Once on the Page Types Schema page, you will be setting up your article page type. The schema is as follows:
-
Short text: title
-
Long text: description
-
Media: image
-
WYSIWYG: body
This is how the complete schema looks like on ButterCMS’ portal:

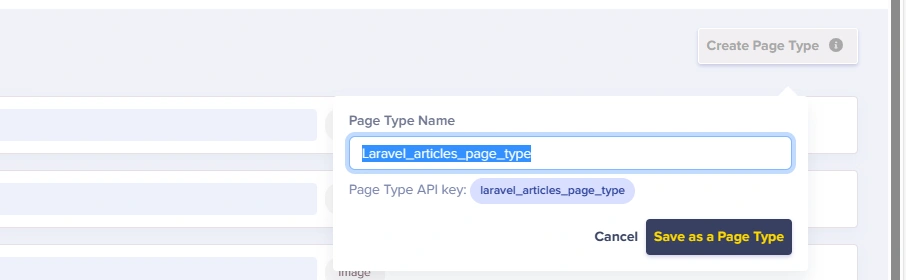
Next, click on the Create Page Type button and save the page type as “Laravel_articles_page_type”:
Since you have a page type, creating pages from this page type will be simple and fast.
Creating Article pages using the Laravel Articles page type
Now that you have created the Laravel Articles page type, let’s create Article pages using this page type.
Building the Article page
To create your first page using the laravel_articles_page_type, hover over the Pages icon on the sidebar and click on the + button aligned with Laravel_articles_page_types:
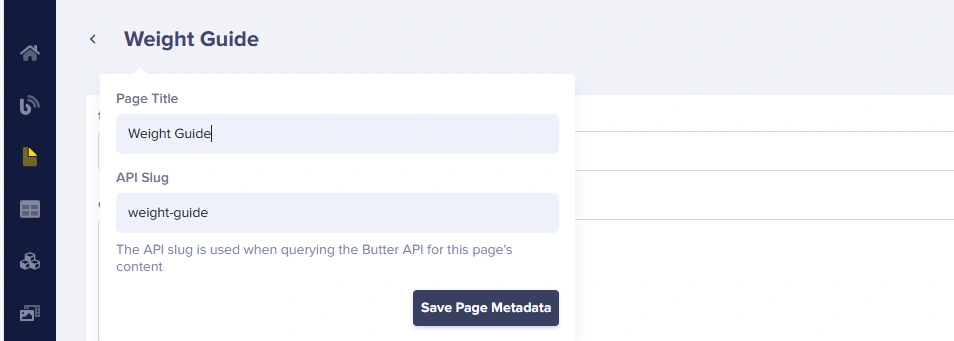
Name the first article “Weight Guide”. This article will instruct customers on how to calculate the weight and size of their parcels:
After saving the page, add content to the content fields like this:
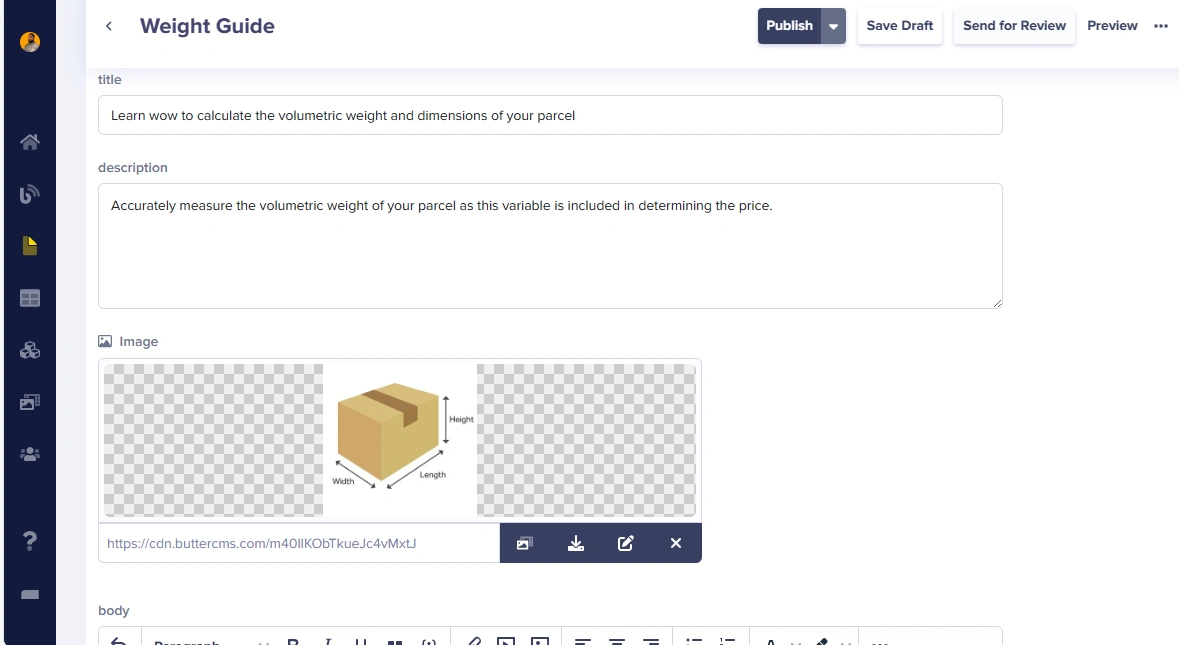
Once the content is added, click on the Publish button to publish the article.
Repeat the steps above and create the following article pages, or just create 5 additional article pages:
-
Get the rates right
-
Track your parcel
-
Open a franchise
-
How to insure your parcels
-
Learn the important policies
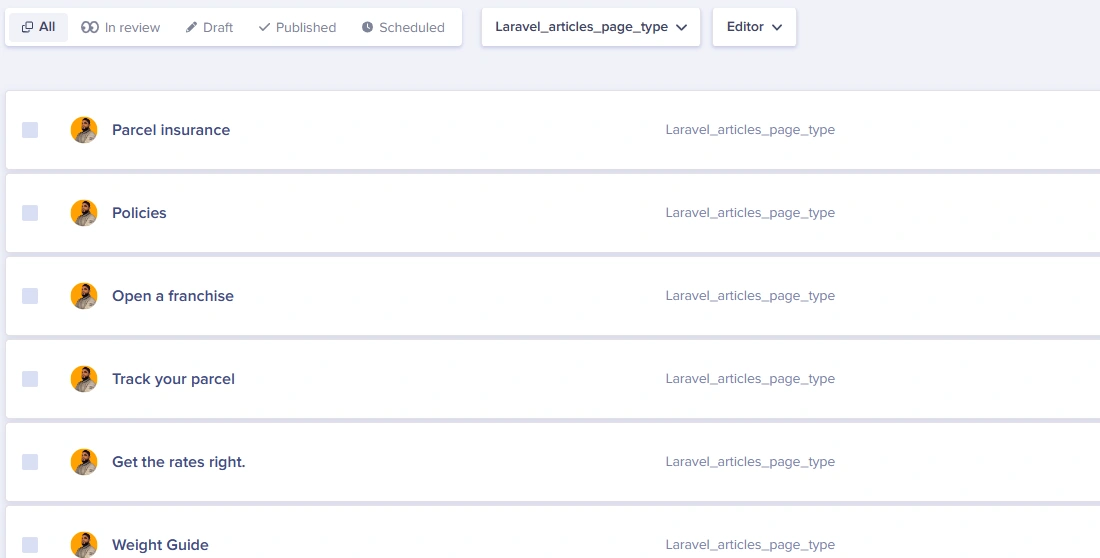
After adding all your articles, hover over the Pages icon on the sidebar and click on Laravel_articles_page_types:
You will be redirected to the Pages dashboard with all the article pages using the Laravel_articles_page_types page type:
Great work! That is it for the Article pages. Let’s move on to creating Category pages.
Building the knowledge base’s Category page
Now you will be using ButterCMS to create a page type for the Category page. This page will reference articles and other categories.
Defining the Category page’s schema
Following the steps used previously, create a new page with the following content fields:
-
Component: SEO
-
Component: Laravel Hero
-
Reference: Article
-
One-to-Many relationship with Laravel_article_page_type
-
-
Reference: Categories
-
One-to-Many relationship with Laravel Category Page Type
-
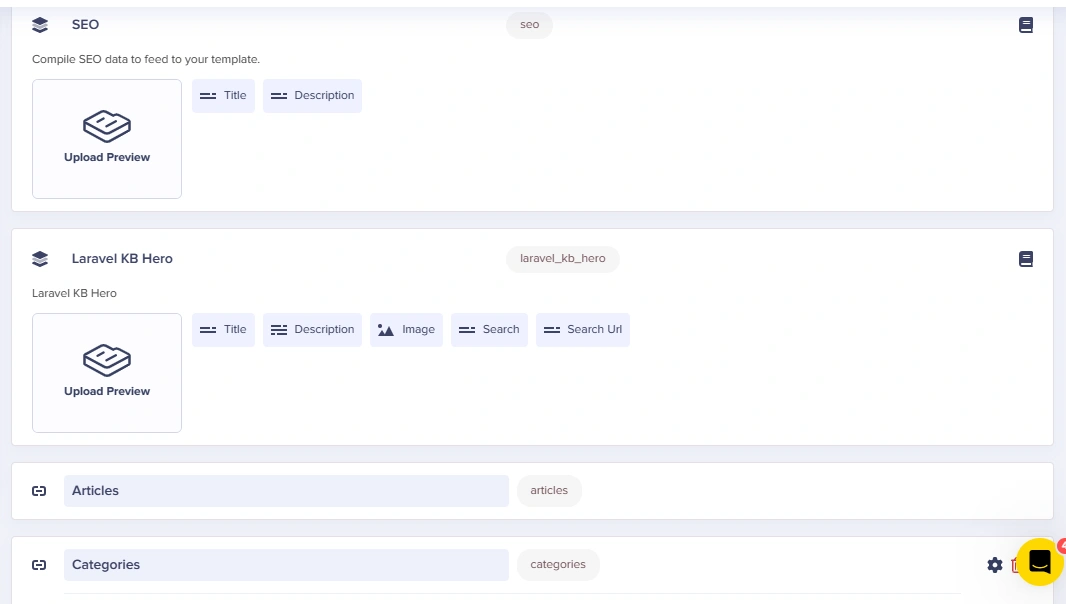
This is how the full schema for this page type looks like:
You will be using this page type to create the following category pages:
-
Get Started category page
-
Billing category page
-
How To category page
To create these pages, hover over the Pages icon and click on the + button next to Laravel Category Page Type.
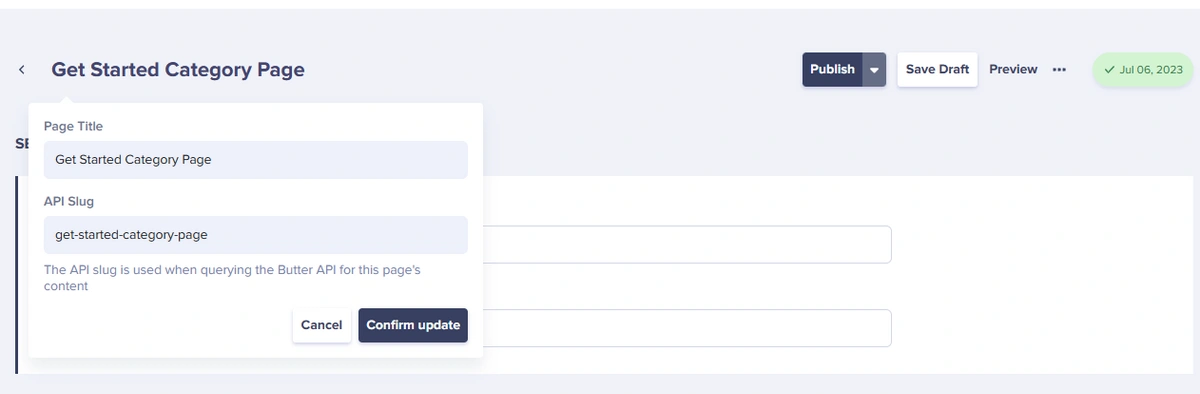
Once redirected, the page will prompt you to add the name of the page. The name for the first page created is “Get Started Category Page”:
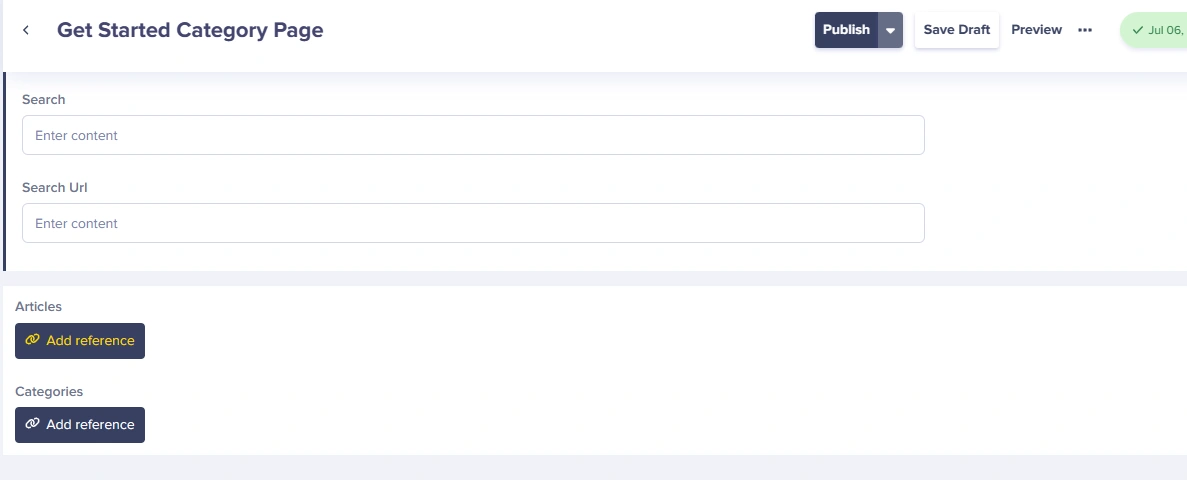
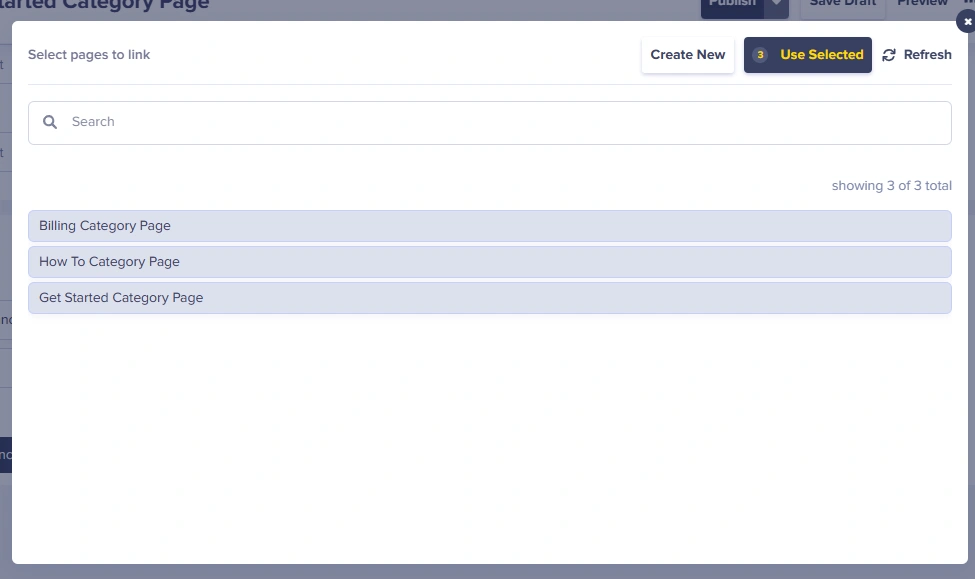
After adding the name, you will use the reference content field to add articles related to this category. To do this, scroll down the page and click on the Add Reference button:
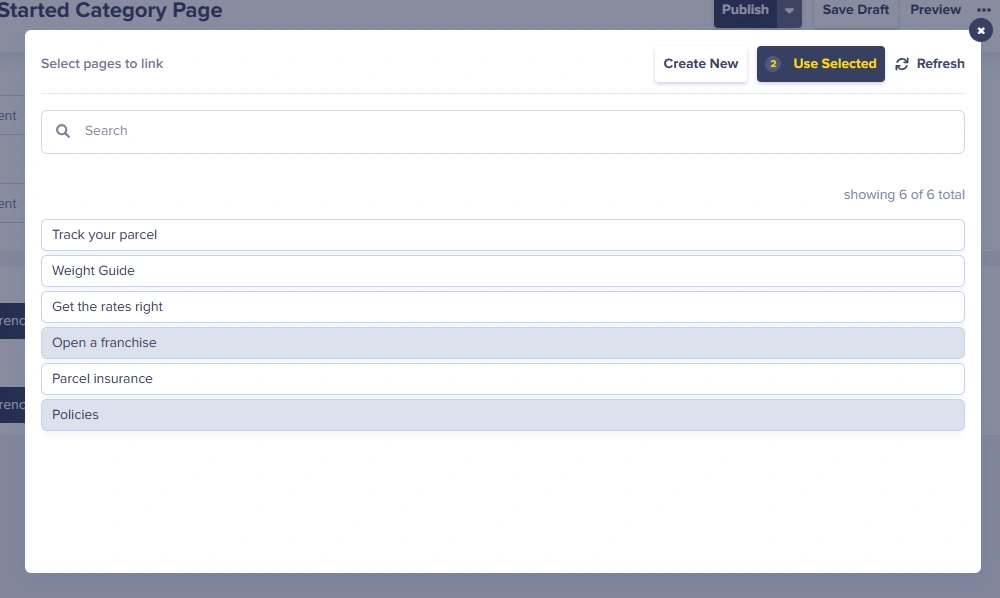
From the modal pop-up, select all the articles related to this category and click the Use Selected button:
After adding related articles, click on the Add Reference button for Categories:
Select all the categories in the pop-up modal and click on the Use Selected button:
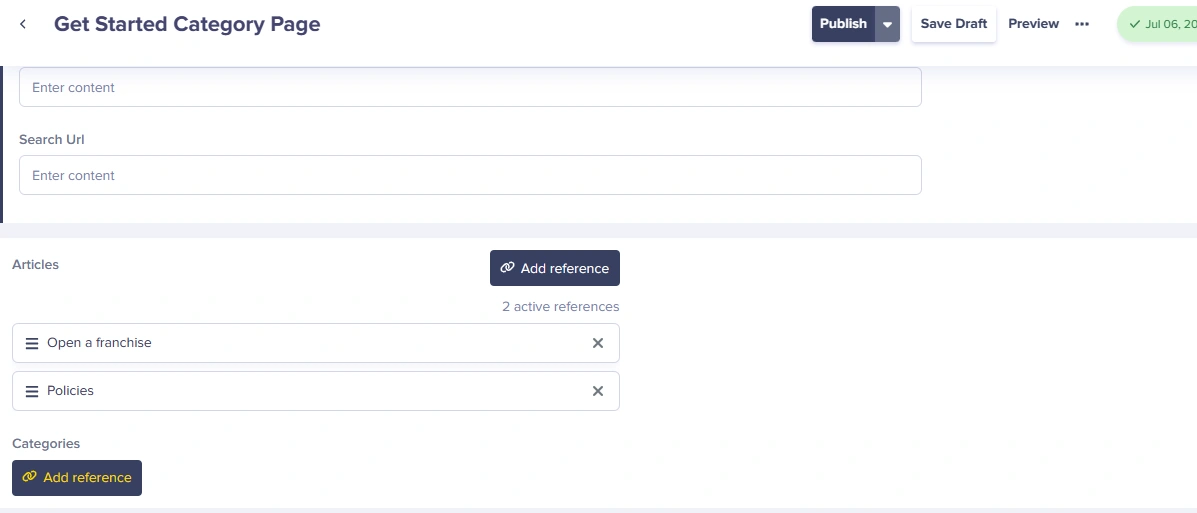
Note that you will only see these options after you have created all the Category pages. Once all the content is added to the first page, the full schema will look like this:
Create the other two pages following the steps above.
Building the Laravel KB Home page
Now, let's build the knowledge base’s home page. The knowledge base’s home page will consist of three separate sections. First, let's start with the components needed for this page.
Creating the Category Cards components
Here you will create reusable components to power your category cards. To start this, hover over the Content Types icon and click on the + button next to Components:

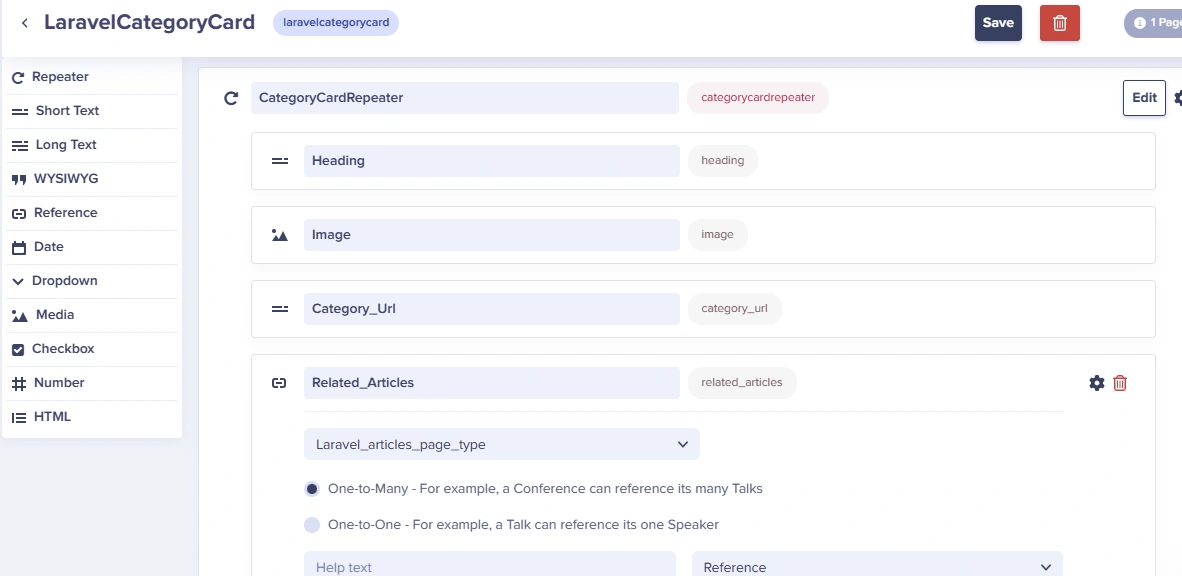
Once you are redirected to the New Component Page, add the following content fields to your component:
-
Repeater: CategoryCardRepeater
-
Short text: Heading
-
Media: Image
-
Short text: Category_Url
-
-
Reference: Related_Article
-
One-to-Many relationship with Laravel_articles_page_type
-
This is how the schema looks like in ButterCMS:
Click on the Create Component button, name the component “LaravelCategoryCard” and save it.
Creating the Hero component
Repeat the steps above for creating a component and create another component for the Hero with the following content fields:
-
Short text: Title
- Long text: Description
-
Media: image
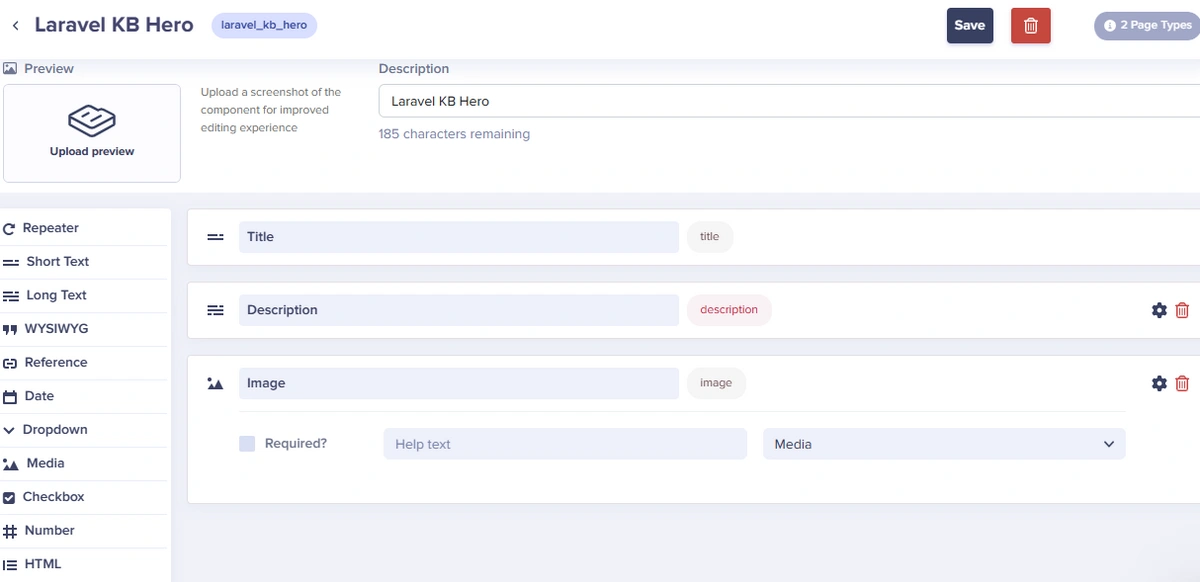
Click on the Create Component button and save the component as “Laravel KB Hero”.
Building the Home page using components
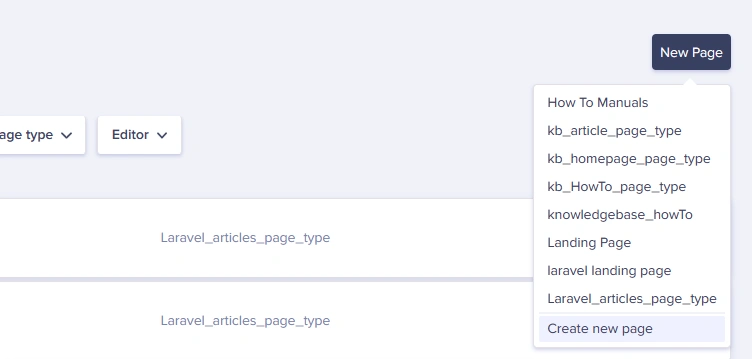
Now you can build the Home page using the components created above. To create the Home page, hover over the Pages icon on the sidebar and click on Pages:
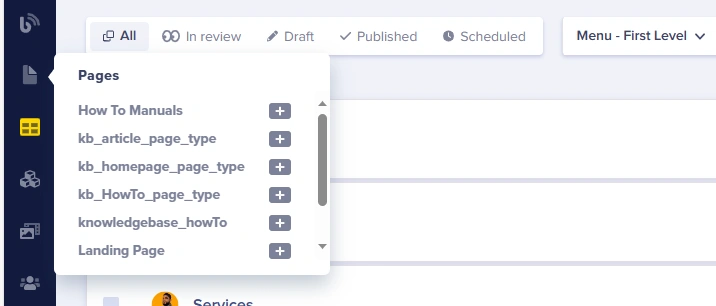
Once redirected, click on the New Page button and select Create new page:
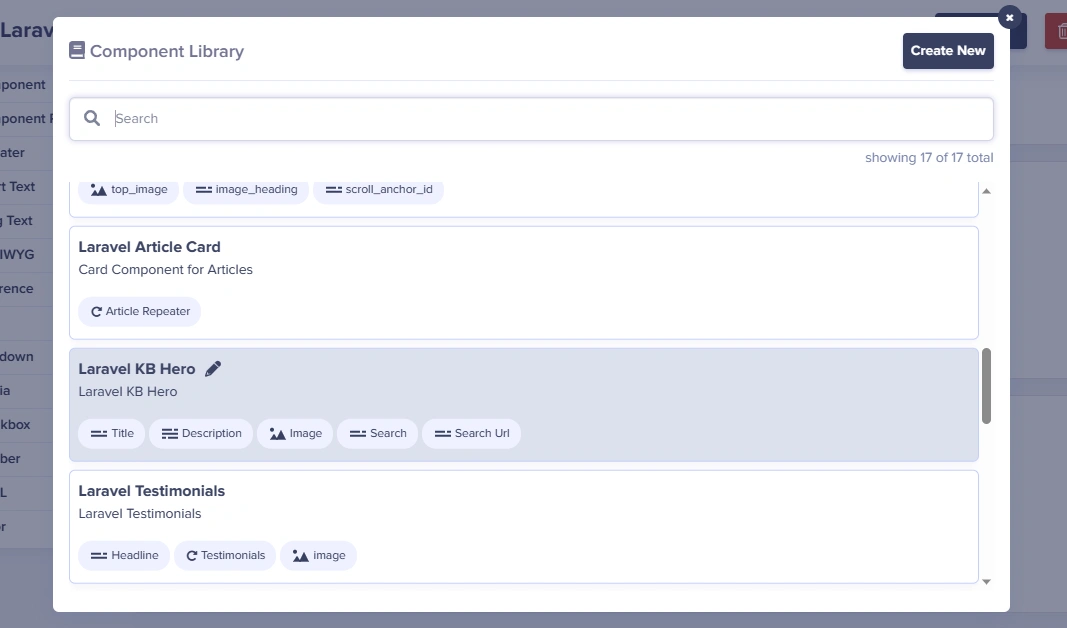
Once you are redirected, click on the book icon which refers to the Component Library aligned with Component:

Find the component you want to use in the Component Library modal, in this case, the Laravel KB Hero component, and select it:
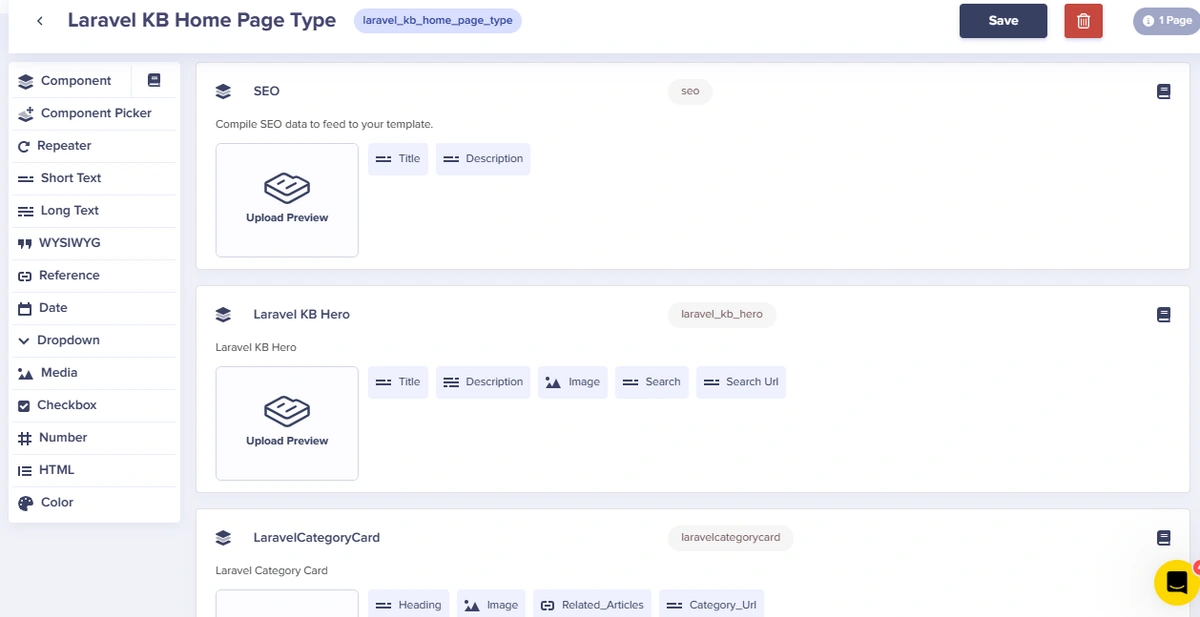
Repeat the steps above and add the LaravelCategoryCard component to the page as well. This is how the complete schema should look like:
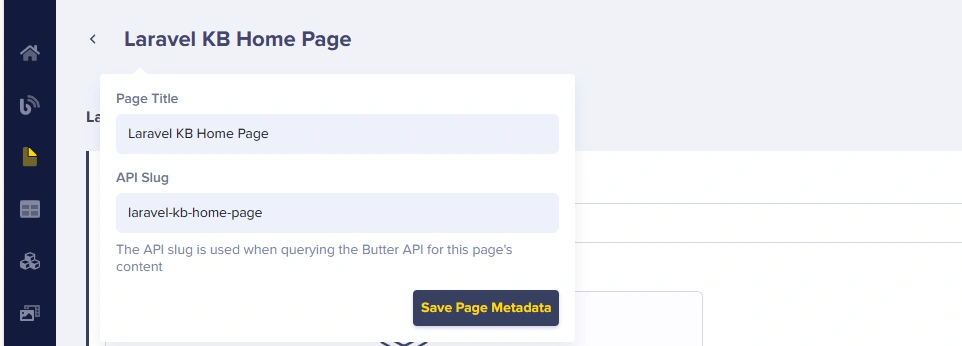
Save the page as “Laravel KB Home Page”:
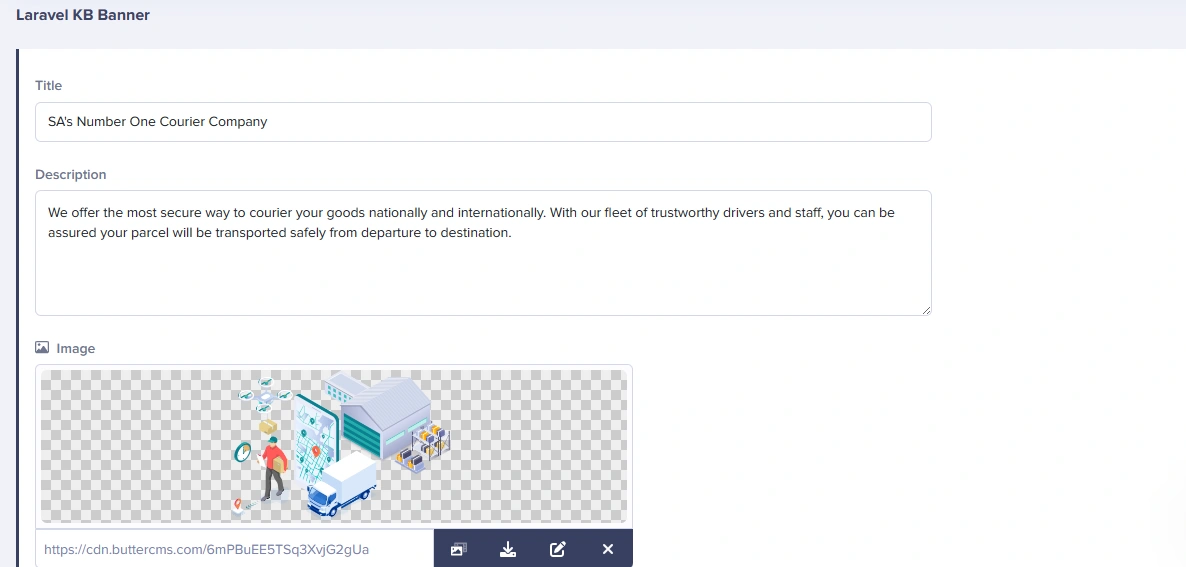
Once the page is saved. You can jump straight into adding content to it. Start by adding content to the Laravel KB Banner component:
Adding Category Cards content on the Home page
You will be using the LaravelCategoryCard component to add the following categories on the Home page:
-
Get Started category page
-
Billing category page
-
How To category page
These are the main categories which you will use to categorize your articles.
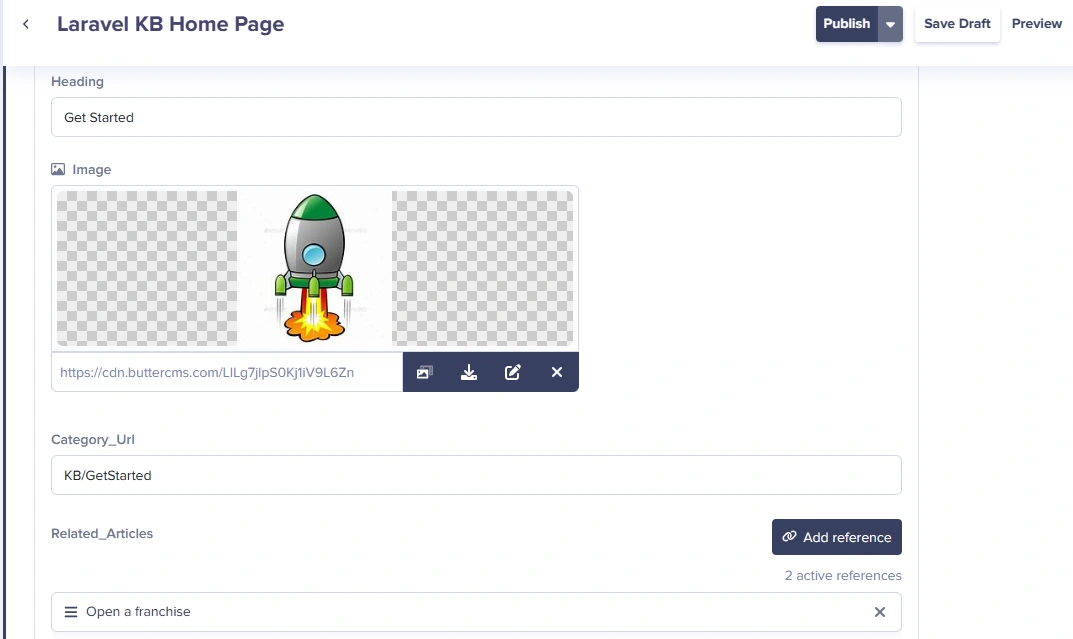
To add these categories, navigate to the LaravelCategoryCard on the Laravel KB Home Page schema. click on the + CategoryCardRepeater button:

The article will open a new repeater item and enable you to provide content for the following:
-
Short text: Heading
-
Short text: Sub_Headline
-
Media: Image
-
Reference: Related_Article
-
Short text: Category_Url
Click on the Add reference button to add the articles related to the category:
After selecting, click on the Use Selected button to return to the main page.
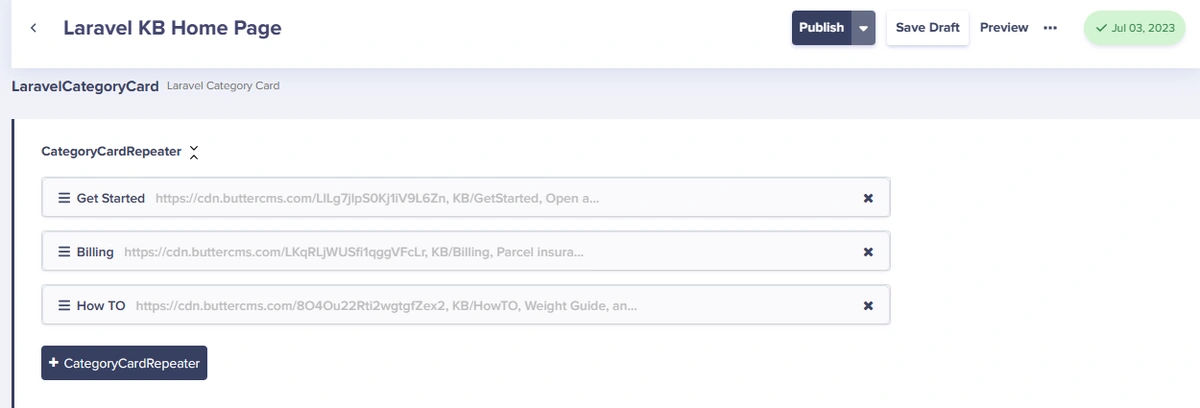
Once all the content has been added for the first category card, this is how it should look like on your ButterCMS portal:
Repeat the steps above to add other featured categories. This is the schema for the CategoryCardRepeater component:
Great work! Now, scroll to the top of the page and click Publish to publish your page.
You are now done with the first part of the tutorial. Let’s move to the second part of the tutorial where you will be building the application’s front-end using Laravel.
Building the knowledge base front-end
In this section of the tutorial, you will be using Laravel to build the front-end. This tutorial uses Visual Studio Code as the code editor. To work with Laravel, we will use PHP and Composer.
Setting up the Laravel application
You need to set up your Laravel application before you start coding the application.
Create a new Laravel project using the following command on your command line:
composer create-project laravel/laravel LaravelKB To add ButterCMS to your project, go to your project directory, open the composer.json file, and under the "require" field, add "buttercms/buttercms-php": "~2.4.0" to the field. Once done, navigate to your application using the following command:
Cd LaravelKBThen run the following commands on your terminal:
Composer update
Composer install
Building the Home page
The first page to be created is the home page for the application.
Creating the controller
After the Laravel application is set up, navigate to LaravelKB\app\Http\Controllers and create a new controller. Name the file KbController.php and add the following code to the file:
<?php


namespace App\Http\Controllers;
use ButterCMS\Model\PostsResponse;
use ButterCMS\ButterCMS;
use Illuminate\Http\Request;
use Illuminate\Support\Facades\Config;
use Illuminate\View\View;
use Illuminate\Support\Facades\Log;
use Illuminate\Support\Facades\Http;


class KbController extends Controller
{
    private static $apiToken = 'c3c37caed6eaa3141e464fc82cab8f83cae7925f';
    private $client;
    public function __construct() {
        $this -> client = new ButterCMS(KbController::$apiToken);
      }


    public function showPage(string $type, string $pageSlug): View
    {
        $page = $this->client->fetchPage($type, $pageSlug);


        return view('HomePage', [
            'pageSeo' => $page->getFields()['seo'],
            'pageCategoryCard' => $page->getFields()['laravelcategorycard'],
            'pageHero' => $page->getFields()['laravel_kb_hero']


        ]);
    }


    public function showKbPage(): View
    {

        return $this->showPage('laravel_kb_home_page_type',          'laravel-kb-home-page');
    }
}
Creating the view
After adding your code, navigate to LaravelKB\resources\views and create a PHP file called HomePage.blade.php and add the following code:
<!doctype html>
<html lang="en">
  <head>
    <link rel="stylesheet" href="{{ asset('css/styles.css') }}">
    <script src="https://kit.fontawesome.com/48764efa36.js" crossorigin="anonymous"></script>
        <link rel="preconnect" href="https://fonts.gstatic.com">
        <link href="https://fonts.googleapis.com/css2?family=Source+Sans+Pro:wght@300;400;600&display=swap" rel="stylesheet">
    <!-- Required meta tags -->
    <meta charset="utf-8">
    <meta name="viewport" content="width=device-width, initial-scale=1">
    <!-- Bootstrap CSS -->
    <link href="https://cdn.jsdelivr.net/npm/bootstrap@5.1.3/dist/css/bootstrap.min.css" rel="stylesheet" integrity="sha384-1BmE4kWBq78iYhFldvKuhfTAU6auU8tT94WrHftjDbrCEXSU1oBoqyl2QvZ6jIW3" crossorigin="anonymous">
    <title>{{ $pageSeo['title'] }}</title>
    <meta name="description" content="{{ $pageSeo['description'] }}">
    <script src="https://cdnjs.cloudflare.com/ajax/libs/jquery/3.6.0/jquery.min.js"></script>


  </head>


  <body>

        <div id="bannerKB">
                    <div class="HomeTop">
                        <div>
                        <a href="/"> <img src="{{ asset('img/logo.png') }}" alt="Logo" height="100px"> </a>
                        </div>

                        <div class="HomeRight">
                            <button id="loginButton"><h3>LOGIN</h3></button>
                            <button id="signupButton"><h3>SIGN UP</h3></button>
                        </div>

                    </div>


                    <div id="heading" style="color:white;">
                    <h1 class="Headline">{{ $pageHero['title'] }}</h1>
                    <h5 class="Sub_Headline">{{ $pageHero['description'] }}</h5>
                    </div>

                    <div id="cover">
                        <form action="{{url('/article/search/')}}">
                            <div class="tb">
                            <div class="td"><input type="text" style="border:none" placeholder="Search Here...." value="{{$searchTerm ?? null}}" name="q" required></div>
                            <div class="td" id="s-cover">
                                <button type="submit">
                                <div id="s-circle"></div>
                                <span></span>
                                </button>
                            </div>
                            </div>
                        </form>
                    </div>
        </div>


        <div id="slideKB" style="margin: 40px;">
            <div class="featuresKB">
        @foreach ($pageCategoryCard['categorycardrepeater'] as $card)
                <a href="{{ route('showCategory', ['param' => $card['category_url']]) }}" class="aStyle">
                    <div class="featuresInnerKB">
                        <div id="fTop">
                            <img src="{{ $card['image'] }}" alt="Component Icon" style="width:260px;height:160px">
                        </div>
                        <div class="fBottom">
                            <h4>{{ $card['heading'] }}</h4>
                            <h6>{{$card['sub_headline']}}</h6>
                        </div>
                    </div>
                </a>
        @endforeach
            </div>


        </div>

    <!-- Option 1: Bootstrap Bundle with Popper -->
    <script src="https://cdn.jsdelivr.net/npm/bootstrap@5.1.3/dist/js/bootstrap.bundle.min.js" integrity="sha384-ka7Sk0Gln4gmtz2MlQnikT1wXgYsOg+OMhuP+IlRH9sENBO0LRn5q+8nbTov4+1p" crossorigin="anonymous"></script>


    <footer>
        <div class="footer-container">
            <div class="logo">
                <img src="{{ asset('img/logo.png') }}" alt="Logo">
            </div>

            <div class="footer-social">
                <a href="#" class="link-no-decoration"><i class="fab fa-facebook"></i></a>
                <a href="#" class="link-no-decoration"><i class="fab fa-twitter"></i></a>
                <a href="#" class="link-no-decoration"><i class="fab fa-instagram"></i></a>
            </div>
        </div>

    </footer>
  </body>
</html>
Creating the route
Then, navigate to ButterApp\routes and open the web.php file and add the following code:
<?php


use App\Http\Controllers\BlogController;
use App\Http\Controllers\PageController;
use App\Http\Controllers\KbController;
use Illuminate\Support\Facades\Route;


Route::get('/', [KbController::class, 'showKbPage'])->where('slug', '.*');
Building the Category page
The knowledge base page will feature all the articles you created.
Creating the controller
Navigate to LaravelKB\app\Http\Controllers. Open the KbController.php file and add the following code function to the file:
public function showCategory($param)
    {


        $page = $this->client->fetchPage('laravel_category_page_type', $param);
        // Use the value passed from the Blade.php file
        // $param variable will contain the value
        // Your code here

        return view('categoryPage', [
            'pageSeo' => $page->getFields()['seo'],
            'pageTitle'   => $page->getFields()['laravel_kb_hero']['title'],
            'pageDescription' => $page->getFields()['laravel_kb_hero']['description'],
            'pageImage' => $page->getFields()['laravel_kb_hero']['image'],
            'pageCategories'    => $page->getFields()['categories'],

            'pageArticles' =>$page->getFields()['articles']
        ]);

    }
Creating the view
After adding your code, navigate to LaravelKB\resources\views and create a PHP file called CategoryPage.blade.php and add the following code:
<!doctype html>
<html lang="en">
  <head>
    <link rel="stylesheet" href="{{ asset('css/styles.css') }}">
    <script src="https://kit.fontawesome.com/48764efa36.js" crossorigin="anonymous"></script>
        <link rel="preconnect" href="https://fonts.gstatic.com">
        <link href="https://fonts.googleapis.com/css2?family=Source+Sans+Pro:wght@300;400;600&display=swap" rel="stylesheet">
    <!-- Required meta tags -->
    <meta charset="utf-8">
    <meta name="viewport" content="width=device-width, initial-scale=1">
    <!-- Bootstrap CSS -->
    <link href="https://cdn.jsdelivr.net/npm/bootstrap@5.1.3/dist/css/bootstrap.min.css" rel="stylesheet" integrity="sha384-1BmE4kWBq78iYhFldvKuhfTAU6auU8tT94WrHftjDbrCEXSU1oBoqyl2QvZ6jIW3" crossorigin="anonymous">
    <title>{{ $pageSeo['title'] }}</title>
    <meta name="description" content="{{ $pageSeo['description'] }}">
    <script src="https://cdnjs.cloudflare.com/ajax/libs/jquery/3.6.0/jquery.min.js"></script>


  </head>
  <body>
        <div id="CategoryBody">

                    <div id="SideBar">
                        <div class="logo" style="display:flex;flex-direction:row;align-items:center;margin-bottom:20px">
                                <a href="/"> <img src="{{ asset('img/logo.png') }}" alt="Logo"> </a>

                            <button id="loginButton"><h5>LOGIN</h5></button>

                        </div>
                        <nav>
                            <ul>
                            @foreach ($pageCategories as $categories)
                                <li>
                                    <a href="{{ route('showCategory', ['param' => $categories['slug']]) }}"></i> {{$categories['fields']['seo']['title']}}</a>
                                </li>
                            @endforeach
                            </ul>
                        </nav>
                    </div>

                    <div id="ArticleSide">
                        <div id="CategoryHero">
                            <h2>
                                {{($pageTitle)}}
                            </h2>
                            <h6> {{$pageDescription}} </h6>
                        </div>
                        <div id="slideKB">
                            <div class="featuresKB">

                        @foreach ($pageArticles as $card)
                                <a href="{{ route('showArticles', ['param' => $card['slug']]) }}" class="aStyle">
                                    <div class="featuresInnerKB">
                                        <div id="fTop">
                                            <img src="{{ $card['fields']['image'] }}" alt="Component Icon" style="width:260px;height:160px">
                                        </div>
                                        <div class="fBottom">
                                            <h4>{{ $card['fields']['title'] }}</h4>
                                        </div>
                                    </div>
                                </a>
                        @endforeach
                            </div>


                        </div>
                    </div>
        </div>

    <!-- Option 1: Bootstrap Bundle with Popper -->
    <script src="https://cdn.jsdelivr.net/npm/bootstrap@5.1.3/dist/js/bootstrap.bundle.min.js" integrity="sha384-ka7Sk0Gln4gmtz2MlQnikT1wXgYsOg+OMhuP+IlRH9sENBO0LRn5q+8nbTov4+1p" crossorigin="anonymous"></script>


  </body>
</html>
Creating the route
Then, navigate to ButterApp\routes and open the web.php file and add the following code:
Route::get('/KbCategories/{param}', [KbController::class, 'showCategory'])->name('showCategory');
Building the Search page
The search functionality will be powered by ButterCMS. The advanced search capability for Pages allows you to filter through your content to quickly locate specific pages.
Creating the controller
Navigate to LaravelKB\app\Http\Controllers and open the KbController.php file and add the following code to the file:
public function showArticlesBySearchQuery(Request $request): View
    {
        //fetch all pages
        $Mainpage = $this->client->fetchPage('laravel_kb_page_type', 'laravel-kb-page');
        // Get the search query from the request
        $searchTerm = $request->query->get('q');
        $pageType = 'laravel_articles_page_type'; // Set your desired page type here

        $url = url('https://api.buttercms.com/v2/pages/search?query=' . urlencode($searchTerm) . '&auth_token=' . urlencode('c3c37caed6eaa3141e464fc82cab8f83cae7925f'));
        // Append the page_type parameter if provided
            if (!empty($pageType)) {
                $url .= '&page_type=' . urlencode($pageType);
            }

        $response = Http::get($url);
        $page = $response->json();

        $data = $page['data'];
        $slugs = [];


            foreach ($data as $item) {
                $slugs[] = $item['slug'];
            }

            return view('searchPage', [
                'pageSeo' => $Mainpage->getFields()['seo'],
                'pageArticleCards' => $Mainpage->getFields()['laravel_article_card'],
                'slug' => $slugs


            ]);

    }
Creating the view
After adding your code, navigate to LaravelKB\resources\views and create a PHP file SearchPage.blade.php and add the following code:
<!doctype html>
<html lang="en">
  <head>
    <link rel="stylesheet" href="{{ asset('css/styles.css') }}">
    <script src="https://kit.fontawesome.com/48764efa36.js" crossorigin="anonymous"></script>
        <link rel="preconnect" href="https://fonts.gstatic.com">
        <link href="https://fonts.googleapis.com/css2?family=Source+Sans+Pro:wght@300;400;600&display=swap" rel="stylesheet">
    <!-- Required meta tags -->
    <meta charset="utf-8">
    <meta name="viewport" content="width=device-width, initial-scale=1">
    <!-- Bootstrap CSS -->
    <link href="https://cdn.jsdelivr.net/npm/bootstrap@5.1.3/dist/css/bootstrap.min.css" rel="stylesheet" integrity="sha384-1BmE4kWBq78iYhFldvKuhfTAU6auU8tT94WrHftjDbrCEXSU1oBoqyl2QvZ6jIW3" crossorigin="anonymous">
    <title>{{ $pageSeo['title'] }}</title>
    <meta name="description" content="{{ $pageSeo['description'] }}">
    <script src="https://cdnjs.cloudflare.com/ajax/libs/jquery/3.6.0/jquery.min.js"></script>


  </head>


  <body style="background-color: white;">


  <div id="bannerKB">
                    <div class="HomeTop">
                        <div>
                        <a href="/"> <img src="{{ asset('img/logo.png') }}" alt="Logo" height="100px"> </a>
                        </div>
                        <div class="HomeRight">
                            <button id="loginButton"><h3>LOGIN</h3></button>
                            <button id="signupButton"><h3>SIGN UP</h3></button>
                        </div>

                    </div>


                    <div id="heading" style="color:white;text-align: center;">
                    <h1 class="Headline"  style="color:white;text-align: center;">Search Our Knowledge Base</h1>
                    <h5 class="Sub_Headline">Learn more about our services by reading articles that dive deep into important topic</h5>
                    </div>

                    <div id="cover">
                        <form action="{{url('/article/search/')}}">
                            <div class="tb">
                            <div class="td"><input type="text" style="border:none" placeholder="Search Here...." value="{{$searchTerm ?? null}}" name="q" required></div>
                            <div class="td" id="s-cover">
                                <button type="submit">
                                <div id="s-circle"></div>
                                <span></span>
                                </button>
                            </div>
                            </div>
                        </form>
                    </div>
        </div>

        <div id="slideKB">


        <h1 class="featureHeading">Search Results</h1>
        <div class="featuresKB">
            @foreach ($pageArticleCards['article_repeater'] as $card)
                <?php
                    $array1 = $card['article_card_reference']['slug'];
                    $array2 = $slug;


                    $commonItems = array_intersect((array)$array1, (array)$array2);
                ?>


                @if (!empty($commonItems))
                <a href="{{ route('showArticles', ['param' => $card['article_card_reference']['slug']]) }}" class="aStyle">
                    <div class="featuresInnerKB">
                        <div id="fTop">
                            <img src="{{ $card['article_card_reference']['fields']['image'] }}" alt="Component Icon" style="width:260px;height:160px">
                        </div>
                        <div class="fBottom">
                            <h4>{{ $card['article_card_reference']['fields']['title'] }}</h4>
                            <p>{{ $card['article_card_reference']['fields']['description'] }}</p>
                        </div>
                    </div>
                </a>
                @endif
            @endforeach
        </div>
        </div>

    <!-- Option 1: Bootstrap Bundle with Popper -->
    <script src="https://cdn.jsdelivr.net/npm/bootstrap@5.1.3/dist/js/bootstrap.bundle.min.js" integrity="sha384-ka7Sk0Gln4gmtz2MlQnikT1wXgYsOg+OMhuP+IlRH9sENBO0LRn5q+8nbTov4+1p" crossorigin="anonymous"></script>

    <footer>
        <div class="footer-container"  style="margin-bottom:20px">
            <div class="logo">
                <img src="{{ asset('img/logo.png') }}" alt="Logo">
            </div>
            <div class="footer-social">
                <a href="#" class="link-no-decoration"><i class="fab fa-facebook"></i></a>
                <a href="#" class="link-no-decoration"><i class="fab fa-twitter"></i></a>
                <a href="#" class="link-no-decoration"><i class="fab fa-instagram"></i></a>
            </div>
        </div>

    </footer>
  </body>
</html>
Creating the route
Navigate to LaravelKB\app\Http\Controllers and open the KbController.php file and add the following code to the file:
Route::get('/article/search', [KbController::class, 'showArticlesBySearchQuery']);Building the Article page
Now, let’s create the Article page for the front-end in the following sequence.
Creating the controller
Navigate to LaravelKB\app\Http\Controllers and open the KbController.php file and add the following code to the file:
public function showArticles($param)
    {
        $page = $this->client->fetchPage('laravel_articles_page_type', $param);
        // Use the value passed from the Blade.php file
        // $param variable will contain the value

        // Your code here

        return view('articlePage', [
            'pageSeo' => $page->getFields()['seo'],
            'title'   => $page->getFields()['title'],
            'description' => $page->getFields()['description'],
            'image' => $page->getFields()['image'],
            'body'  => $page->getFields()['body']
        ]);
    }
Creating the view
After adding your code, navigate to LaravelKB\resources\views and create a PHP file articlePage.blade.php and add the following code:
<!doctype html>
<html lang="en">
  <head>
    <link rel="stylesheet" href="{{ asset('css/styles.css') }}">
    <script src="https://kit.fontawesome.com/48764efa36.js" crossorigin="anonymous"></script>
        <link rel="preconnect" href="https://fonts.gstatic.com">
        <link href="https://fonts.googleapis.com/css2?family=Source+Sans+Pro:wght@300;400;600&display=swap" rel="stylesheet">
    <!-- Required meta tags -->
    <meta charset="utf-8">
    <meta name="viewport" content="width=device-width, initial-scale=1">
    <!-- Bootstrap CSS -->
    <link href="https://cdn.jsdelivr.net/npm/bootstrap@5.1.3/dist/css/bootstrap.min.css" rel="stylesheet" integrity="sha384-1BmE4kWBq78iYhFldvKuhfTAU6auU8tT94WrHftjDbrCEXSU1oBoqyl2QvZ6jIW3" crossorigin="anonymous">
    <title>{{ $pageSeo['title'] }}</title>
    <meta name="description" content="{{ $pageSeo['description'] }}">
    <script src="https://cdnjs.cloudflare.com/ajax/libs/jquery/3.6.0/jquery.min.js"></script>


  </head>


  <body style="background-color: white;">
        <div id="TopMenu">
            <div class="logo">
                <a href="/"> <img src="{{ asset('img/logo.png') }}" alt="Logo"> </a>
            </div>
            <div class="menuContainer">
                <ul class="menu">
                    <li class="has-submenu">
                        <a href="#">Services</a>
                        <ul class="submenu">
                            <li><a href="#">Collection</a></li>
                            <li><a href="#">National Sachel</a></li>

                        </ul>
                    </li>
                    <li class="has-submenu">
                        <a href="#">Tools</a>
                        <ul class="submenu">
                            <li><a href="#">API</a></li>
                            <li><a href="#">eCommerce</a></li>
                            <li><a href="#">eWallet</a></li>
                        </ul>
                    </li>
                    <li class="has-submenu">
                        <a href="#">Learn</a>
                        <ul class="submenu">
                            <li><a href="/KbPage">Knowledge Base</a></li>
                            <li><a href="#">FAQ</a></li>

                        </ul>
                    </li>
                    <li><a href="#">Contact Us</a></li>

                </ul>
            </div>
        </div>


        <div id="bannerKB" style="background-repeat: no-repeat; background-size: cover;background-position: center;color:white">


                    <h1 class="Headline">{{$title}}</h1>
                    <h5 class="Sub_Headline">{{$description}}</h5>


        </div>
        <div id="articleImgDiv">
                <img src="{{$image}}" alt="Article Image" style="width:700px">
        </div>


        <div id="articleBody">
                {!! $body !!}
        </div>

    <!-- Option 1: Bootstrap Bundle with Popper -->
    <script src="https://cdn.jsdelivr.net/npm/bootstrap@5.1.3/dist/js/bootstrap.bundle.min.js" integrity="sha384-ka7Sk0Gln4gmtz2MlQnikT1wXgYsOg+OMhuP+IlRH9sENBO0LRn5q+8nbTov4+1p" crossorigin="anonymous"></script>

  </body>
</html>
Creating the route
Navigate to LaravelKB\app\Http\Controllers and open the KbController.php file and add the following code to the file:
Route::get('/KbArticle/{param}', [KbController::class, 'showArticles'])->name('showArticles');
Building the styling
To add styling to your application, navigate to the public folder and create a folder named “css”. Under the folder, create the CSS file styles.css. Here is the minified version of the file named styles.min.css:
#banner{width:100%;height:570px;display:flex;flex-direction:row}#bannerKB{height:400px;display:flex;flex-direction:column;background-color:#649ce4;color:#add8e6;margin-bottom:0;font-family:"Times New Roman",Times,serif;justify-content:center;align-items:center;font-weight:bolder}#bannerImg{width:45%;padding:10px}#S_top{justify-content:center;text-align:center}a{text-decoration:none}#welcomeText{font-size:20px;font-family:"Times New Roman",Times,serif}#welcomeText1{font-size:40px;font-family:"Times New Roman",Times,serif}#S_bot{width:100%;display:flex;flex-direction:column;align-items:center;margin-top:50px}.custom-bg-6{background-color:#0b7f8e;margin:5px;width:30%;border:#add8e6 2px solid;padding:15px;text-decoration:none;color:#cad0e9;text-align:center}.aStyle{text-decoration:none}#slide{width:100%;color:#0b7f8e;margin:0}#slideKB{color:#0b7f8e;margin-top:0}.featureHeading{text-align:center;margin-top:25px;padding:10px;font-weight:bolder;color:#0b7f8e;margin-bottom:0;font-family:"Times New Roman",Times,serif}
.features{display:flex;flex-direction:row;align-content:space-between;align-items:normal;width:100%;justify-content:center;margin-top:0;font-family:"Times New Roman",Times,serif}.featuresKB{display:flex;flex-direction:row;margin:15px;margin-top:0;font-family:"Times New Roman",Times,serif;justify-content:center;height:auto;flex-wrap:wrap}.featuresInner{display:flex;flex-direction:column;margin-top:10px;margin-bottom:10px;margin-right:20px;margin-left:20px;color:#0b7f8e;justify-content:center;font-family:'Montserrat',sans-serif;border-right:#649ce4 solid 2px}.featuresInnerKB{display:flex;flex-direction:column;margin-right:20px;color:#649ce4;font-weight:bolder;justify-content:center;font-family:'Montserrat',sans-serif;height:max-content;margin-right:20px;border-radius:20px;box-shadow:5px 5px 5px #649ce400,10px 10px 0 20px #ffffffeb}.fBottom{text-align:center;font-family:"Times New Roman",Times,serif;padding:5px;width:100%}#fTop{text-align:center}#form{margin:15px;display:flex;flex-direction:row}
#formInput{border-radius:15px;background-color:#add8e6;border-color:#add8e6;height:70px;width:600px;margin-right:0}#formBtn{width:50px;height:50px;margin:0;padding:0;border:none}#articleImgDiv{margin:10px;justify-content:center;text-align:center}#articleBody{margin:20px;justify-content:center;align-items:center;align-content:center;color:#0d0d0d;padding:60px}#TopMenu{display:flex;flex-direction:row;width:100%;margin-bottom:0}.logo{display:inline-block;vertical-align:middle}.logo img{width:100px;height:auto}.menuContainer{justify-items:center;align-items:center;width:84%}.menu{list-style:none;padding:0;margin:0;font-family:"Times New Roman",Times,serif;color:#0b7f8e;text-align:center;height:60px;justify-items:center;align-items:center;font-weight:bolder;font-size:20px;margin-bottom:5px}.menu li{display:inline-block;position:relative;vertical-align:middle;align-items:center;margin-top:5px}.menu li a{display:block;padding:10px;text-decoration:none;color:inherit}.menu li:hover>.submenu{display:block}
.submenu{display:none;position:absolute;top:100%;left:0;background-color:#f9f9f9;padding:0;margin:0;list-style:none;width:fit-content}.submenu li{display:block;width:120px}.submenu li a{display:block;padding:10px;text-decoration:none;color:inherit}.submenu li a:hover{background-color:#e3e3e3}.footer-container{background-color:#649ce4;color:#0b7f8e;text-decoration:none;display:flex;flex-direction:column;align-items:center}.link-no-decoration{text-decoration:none;color:inherit}.link-no-decoration:hover{text-decoration:none;color:inherit}.footer-social{margin:10px;margin-bottom:10px;height:40px;display:flex;flex-direction:row;align-content:space-evenly}.footer-social a{margin:5px;font-size:larger}.tb{display:table;width:100%}#heading{height:200px;position:absolute}.HomeTop{display:flex;flex-direction:row;height:100px;width:100%}.HomeRight{display:flex;flex-direction:row;float:right;margin-left:900px}#loginButton{border-radius:20px;box-shadow:0 10px 40px #649ce4,0 0 0 20px #ffffffeb;transform:scale(.6);width:140px}
#signupButton{border-radius:20px;box-shadow:0 10px 40px #649ce4,0 0 0 20px #ffffffeb;transform:scale(.6);width:140px}#cover{left:0;right:0;width:1300px;padding:35px;margin-top:100px;border-radius:20px;box-shadow:0 10px 40px #649ce4,0 0 0 20px #ffffffeb;transform:scale(.6)}.td{display:table-cell;vertical-align:middle}input,button{color:#fff;font-family:Nunito;padding:0;margin:0;border:none;background-color:transparent;outline:none}form{height:96px}input[type=text]{width:100%;height:96px;border:none;font-size:60px;line-height:1;outline:none}input[type=text]::placeholder{color:#fff}.Sub_Headline{text-align:center}#s-cover{width:1px;padding-left:35px}button{position:relative;display:block;width:84px;height:96px;cursor:pointer;border:none}#s-circle{position:relative;top:-8px;left:15px;width:43px;height:43px;margin-top:0;border-width:15px;border:15px solid #fff;background-color:transparent;border-radius:50%;transition:.5s ease all}button span{position:absolute;top:68px;left:43px;display:block;width:45px;height:15px;background-color:transparent;border-radius:10px;transform:rotateZ(52deg);transition:.5s ease all}
button span:before,button span:after{content:"";position:absolute;bottom:0;right:0;width:45px;height:15px;background-color:#fff;border-radius:10px;transform:rotateZ(0);transition:.5s ease all}#s-cover:hover #s-circle{top:-1px;width:67px;height:15px;border-width:0;background-color:#fff;border-radius:20px}#s-cover:hover span{top:50%;left:56px;width:25px;margin-top:-9px;transform:rotateZ(0)}#s-cover:hover button span:before{bottom:11px;transform:rotateZ(52deg)}#s-cover:hover button span:after{bottom:-11px;transform:rotateZ(-52deg)}#s-cover:hover button span:before,#s-cover:hover button span:after{right:-6px;width:40px;background-color:#fff}#CategoryHero{background-color:#fff;color:#649ce4;justify-content:center;text-align:center;height:120px;margin:20px;display:flex;align-items:center;flex-direction:column;font-weight:bolder;margin-top:-190px}#CategoryBody{display:flex;flex-direction:row}#SideBar{background-color:#649ce4;color:#0b7f8e;height:700px}#ArticleSide{width:90%;justify-content:center;display:flex;align-items:center;flex-direction:column;align-content:space-between}
nav ul{margin:0;padding:0;width:260px;top:0;left:0;background-color:#649ce4}nav ul li{list-style:none}nav ul li a{display:block;font-family:'Montserrat',sans-serif;text-decoration:none;text-transform:uppercase;font-size:20px;color:#fff;position:relative;padding:25px 0 25px 38px}nav ul li a:hover{color:#649ce4;background:#fff;border-radius:40px 0 0 40px;height:100%}nav ul li a:active{color:#649ce4;background:#fff;border-radius:40px 0 0 40px;height:100%}nav ul li a:hover:before{width:95%}
Congratulations! Just like that, you are done creating your application and it is ready for deployment.
Running your application locally
To run your Laravel application on your localhost, navigate to your terminal. Ensure that the terminal is in your application’s directory by running the following commands:
cd app_name
php artisan serve
By default, PHP will host the application on 127.0.0.1:1800 port. Hold control and click on the link to get redirected to the web application on your default browser.
Our final application
Once you are done with this tutorial. The knowledge base is set up to lead the user to read articles in two ways: through the category section and the search function.
This is how the category section approach looks like on the front-end:
This is how the search function approach looks like on the front-end:
Final thoughts
ButterCMS enables marketers to determine the content passed to the application’s front end and makes it easy for the marketer to structure pages without coding. As a developer, building a complex application without having to set up and maintain a database is a great relief. Since ButterCMS uses an API to expose data, there is no need to know or learn a backend programming language to create complex applications. Overall, using ButterCMS to power your knowledge base application saves a lot of time, separates the backend logic from the front-end logic, and empowers them to supply content to complex applications without having to code. To learn more about how you can use ButterCMS with Laravel, check out the following tutorials:
- How to Build Compelling Laravel Landing Pages with ButterCMS
- How to Build a Blog with Laravel (& Send Slack Notifications)
- Laravel Forge: Everything You Need to Know to Get Started
ButterCMS is the #1 rated Headless CMS


Related articles
Don’t miss a single post
Get our latest articles, stay updated!
Levis Masonde is a software developer with a passion for coding in React Native and Python as well as keeping up with new innovations with plans to raise awareness of programming.